Systeme.io simplifies these processes with its user-friendly interface and drag-and-drop features, making it accessible even for those with limited experience. While it offers valuable solutions, it also has some limitations. This guide provides the necessary information to help you decide if Systeme.io meets your business needs. Let’s get started.
Systeme.io stands out as a well-known business management solution, simplifying the complexities of initiating and overseeing an online business. Whether your offerings are digital, such as courses and blogs, or tangible products like clothing and accessories in an online store, this versatile tool provides a streamlined approach to business operations.
Imagine a platform that brings together all parts of your business in one place. This solution makes product creation easy and helps you build sales funnels. It also offers tools to manage leads and customers with effective email marketing. What makes this platform special is its ability to give you insights into your sales performance, creating a central spot for your business activities.
Systeme.io is designed with the main goal of assisting you in establishing and overseeing your online business right from the beginning. Let’s explore a variety of scenarios where this platform proves to be highly beneficial:
An aspect that stands out as a major advantage for Systeme.io is its cost-effectiveness. Let’s learn in detail about Systeme.io’s price list:
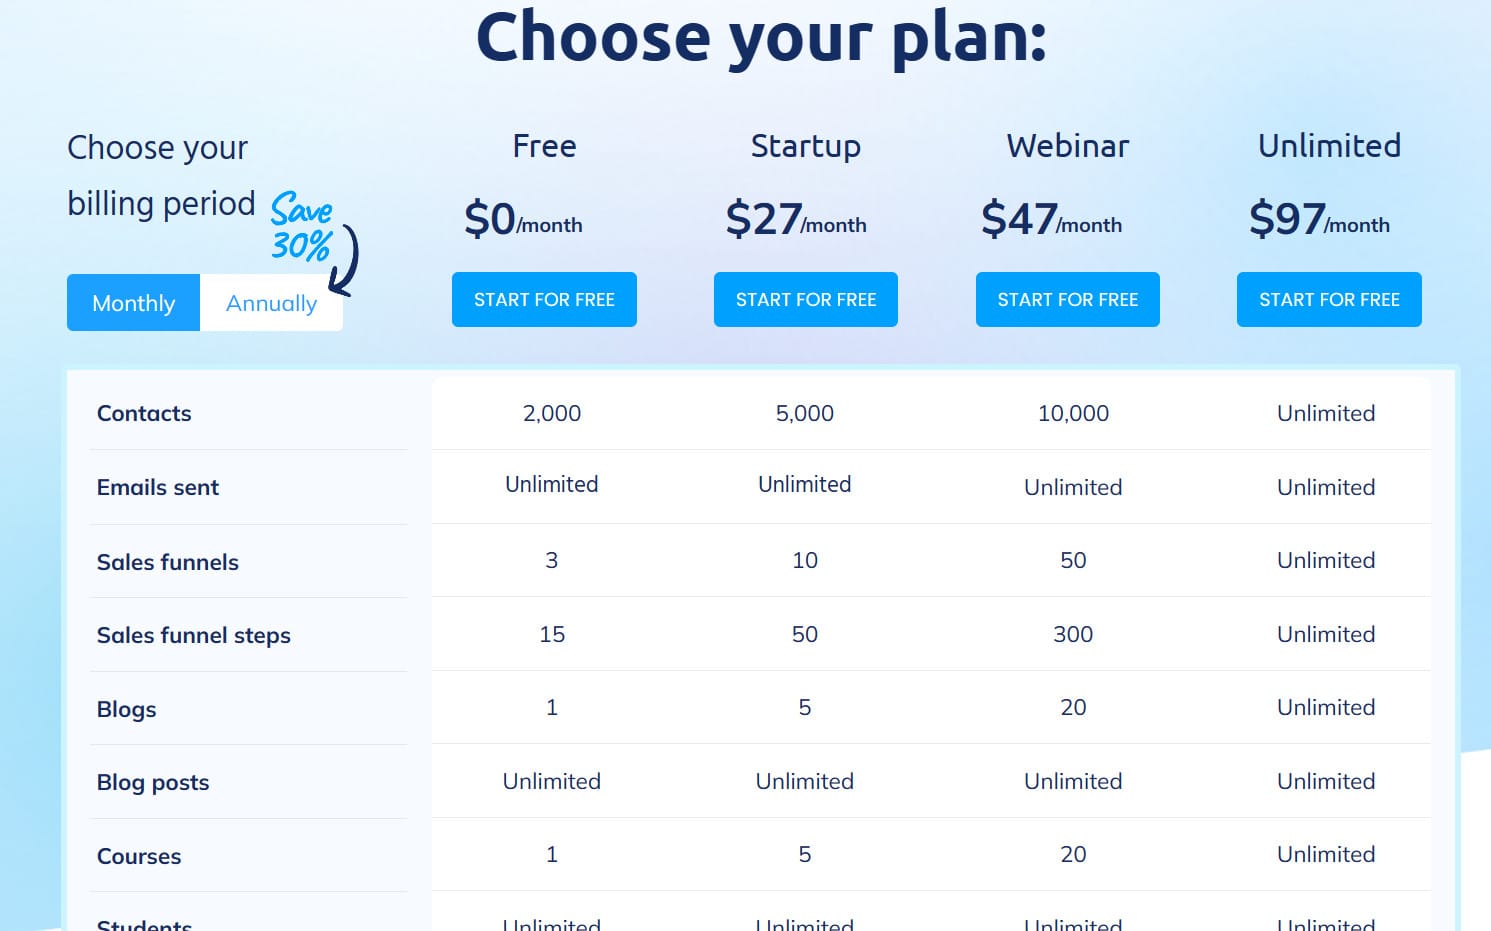
Systeme.io price list
Systeme.io’s free plan is great for startups and small teams, allowing unlimited assistant accounts. It has limitations: one automation rule, one A/B test, and one email campaign, with no migration support.
The Startup plan offers 3 custom domains, 10 A/B tests, custom automation rules, email campaigns, 10 sales funnels, and 5 blogs.
Designed for midsize businesses, the Webinar plan supports 10,000 email contacts, 100 automation rules, 100 email campaigns, and 50 A/B tests.
For $97 monthly or $828 annually, the Unlimited plan provides all features without restrictions for larger businesses.
Systeme.io accepts credit/debit cards and PayPal. Credit card payments allow for automatic deductions, while PayPal requires full payment upfront. To switch plans, contact customer support to cancel the old plan.
Note: Systeme.io offers a free plan to evaluate its features, along with a 30-day money-back guarantee. Upgrades are simple via Settings, but downgrades need customer support.
Maybe you are interested:
Stan Store vs Systeme.io: The Right All-in-One Marketing Tool?
Systeme.io vs Builderall: Which System is Better in 2025?
Kajabi vs Systeme: Which One is Better for Your Business in 2025?
Systeme.io has garnered positive reviews, with 92% of 2,443 users on Trustpilot giving it 5 stars and a rating of 4.8. Known for its ease of use and migration support, it offers a free forever plan and reasonably priced paid options. Many users appreciate its superior functionality and cost-effectiveness compared to other platforms.
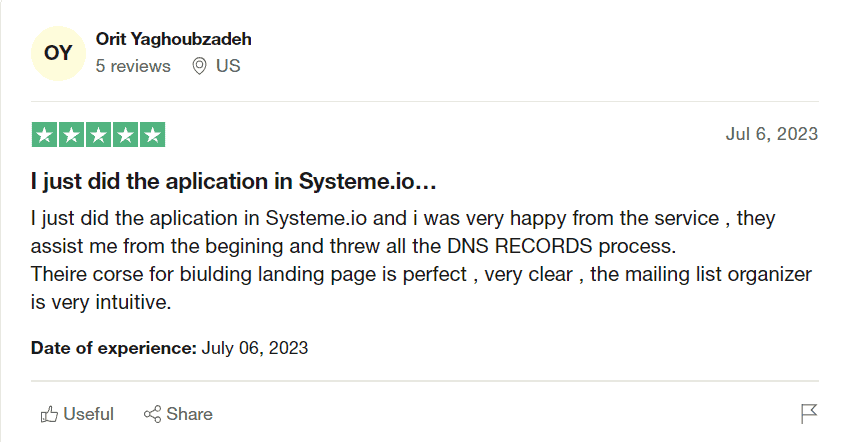
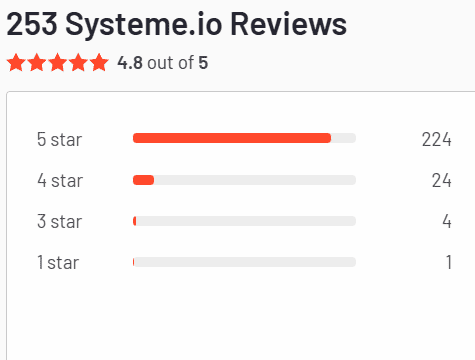
Customer support is generally praised, though there are concerns about addressing certain 3-star reviews. On G2, 224 of 253 reviewers also rated it 5 stars, endorsing Systeme.io as a comprehensive solution for managing business operations effectively.
Eager to delve into the myriad possibilities that Systeme.io unfolds for users? Allow me to provide you with an extensive exploration of the platform’s most exceptional features. Our detailed review of the features below gives you an overview of the capabilities that Systeme.io can provide to support your business.
Systeme.io offers a range of features for effective email management, allowing users to send bulk emails to unlimited recipients, even on the free plan. This streamlined process helps businesses connect with a broad audience efficiently.
Email marketing stands out for its non-intrusiveness, especially with an opt-out option that respects user preferences and adheres to privacy standards.
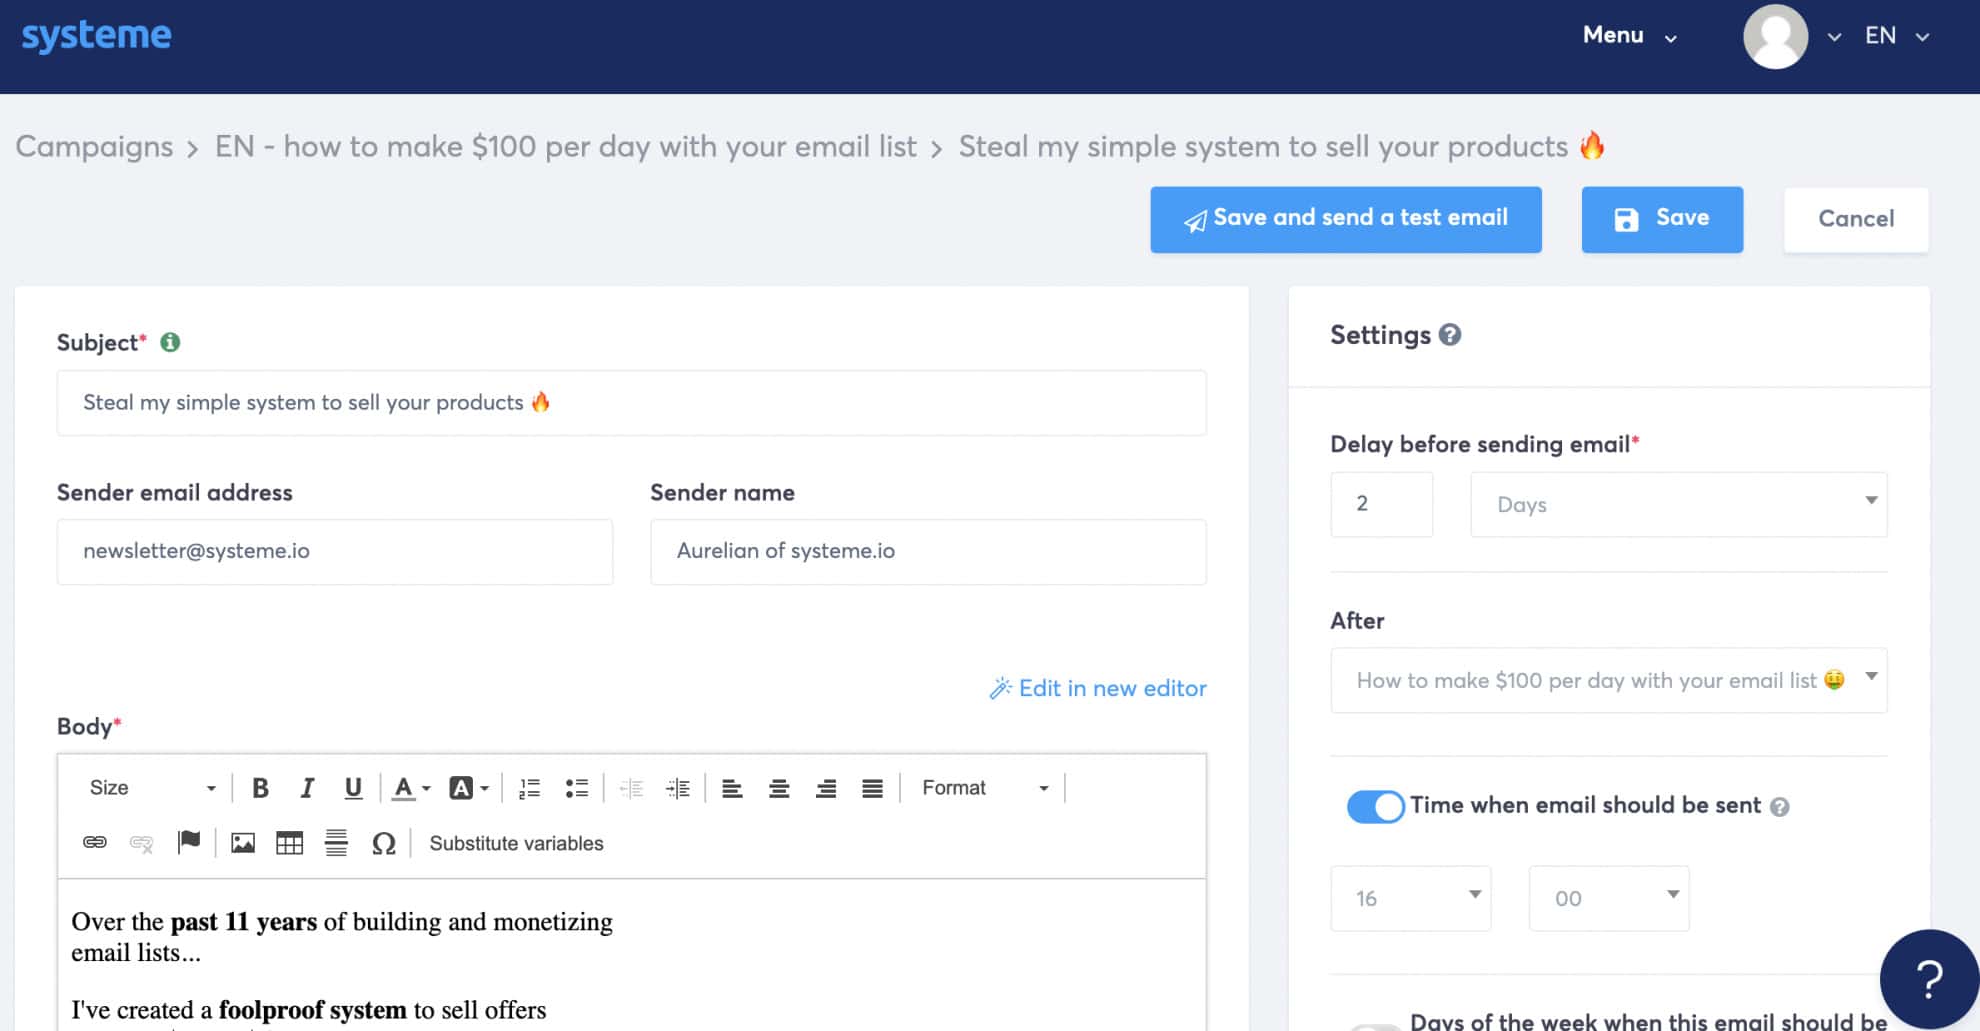
With pre-designed templates, users can easily create visually appealing emails for various purposes, ensuring consistent communication without extensive design work. The ability to broadcast emails to the entire contact list enhances reach and impact, making it easier to engage audiences.
Additionally, Systeme.io allows users to schedule emails for future delivery, making it convenient to time communications for optimal visibility and engagement.
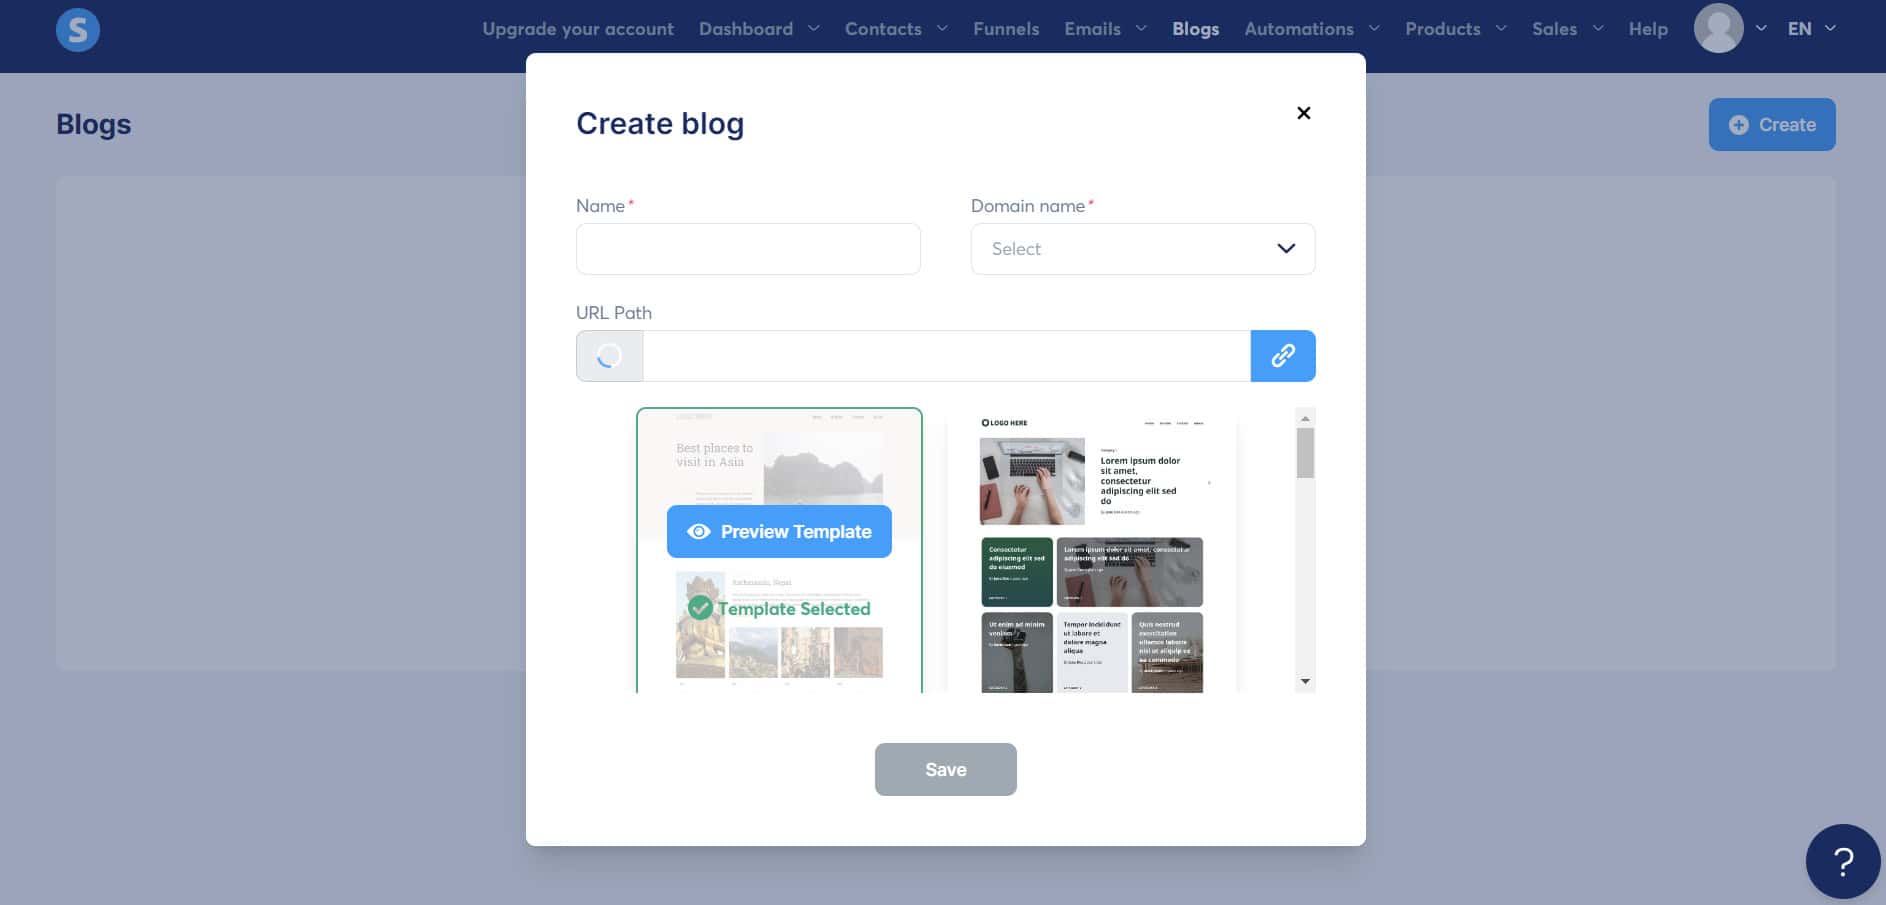
Systeme.io is a user-friendly platform for creating blogs, ideal for those without coding experience. Start by selecting a template from the “Blogs” section. Once set up, manage layouts and posts easily from the dashboard.
Organize content by categories, add widgets like footers and testimonials, and customize your blog using the drag-and-drop feature in the “Blocks” tab.
Creating an e-commerce platform is simple with Systeme.io’s drag-and-drop builder. You can sell physical or digital products, including courses. Custom domains enhance your brand’s credibility. The order management system lets you track and analyze orders, improving inventory management and customer satisfaction.
Systeme.io is a powerful automation tool that lets users create customizable workflows under the “Funnels” section. Users start with a “Trigger” (e.g., a new sale) that activates an “Action,” like sending a thank-you email or tagging customers for future marketing.
Its user-friendly interface makes automation accessible for everyone, helping businesses save time and improve customer engagement. Overall, Systeme.io enhances efficiency and builds customer loyalty through streamlined processes.
A/B testing in Systeme.io is simple and crucial for optimizing your digital content. After setting up your product, create a funnel and choose a variant for comparison. By clicking “Start A/B Testing,” you can evaluate performance.
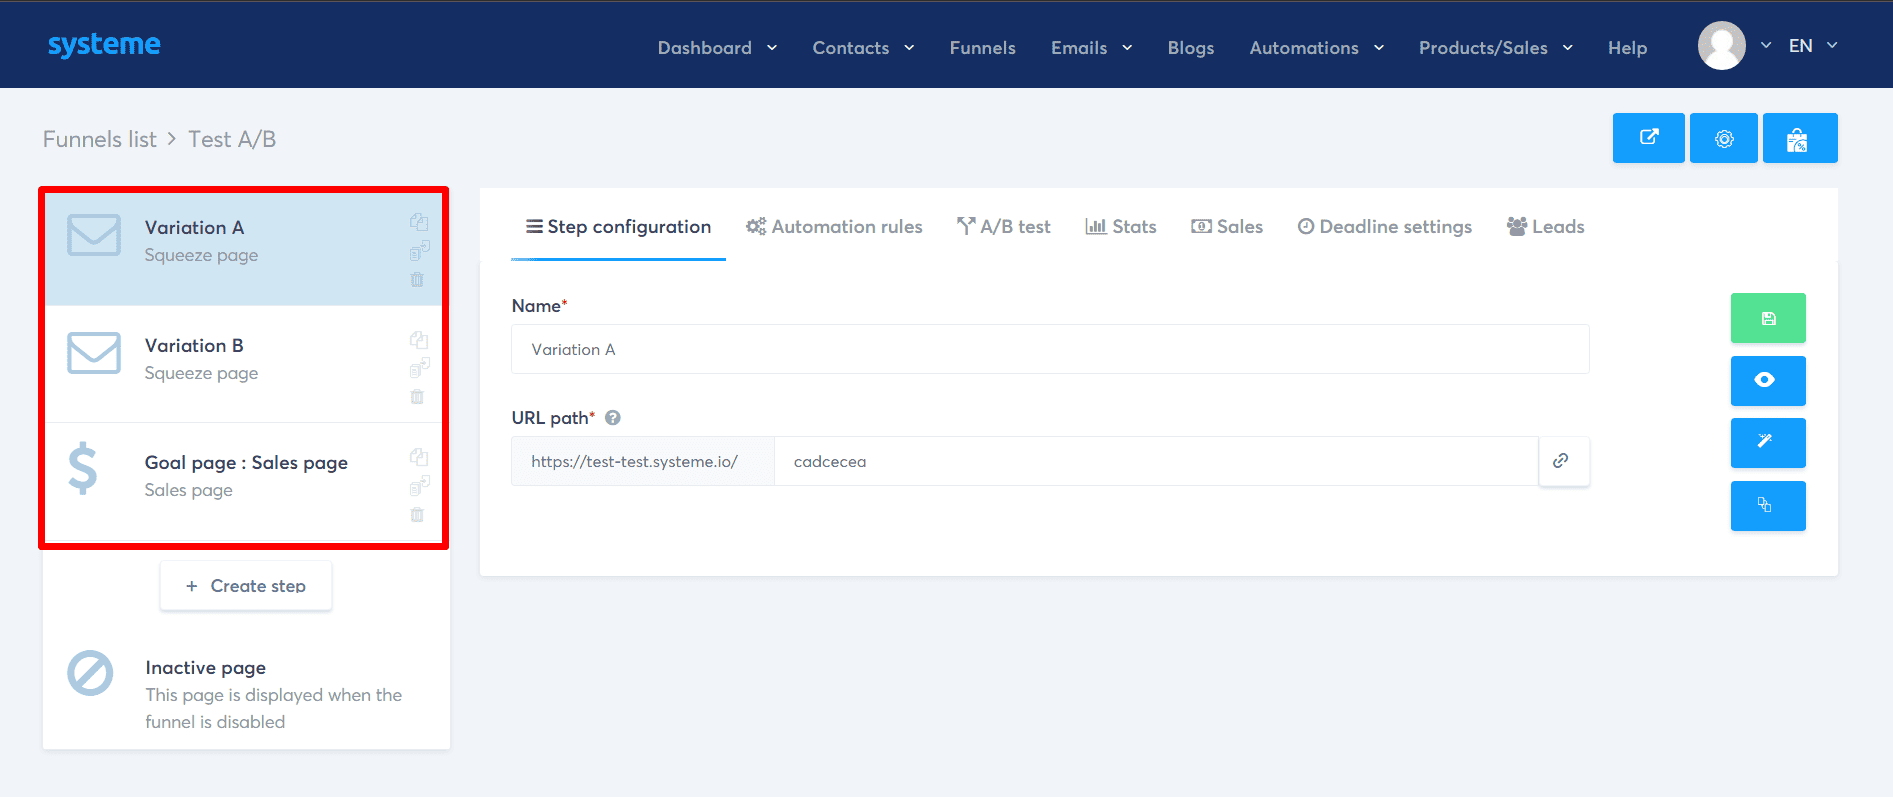
For instance, when designing a new course page, test different templates to see which engages your audience best. This process helps refine your content based on real user interactions, allowing for data-driven decisions.
Overall, A/B testing promotes adaptability and continuous improvement, essential for success in the digital landscape.
Systeme.io simplifies online payment management, allowing easy integration with gateways like PayPal, Stripe, Razorpay, and Flutterwave. By using PayPal or Stripe, you can avoid transaction fees and keep all your revenue.
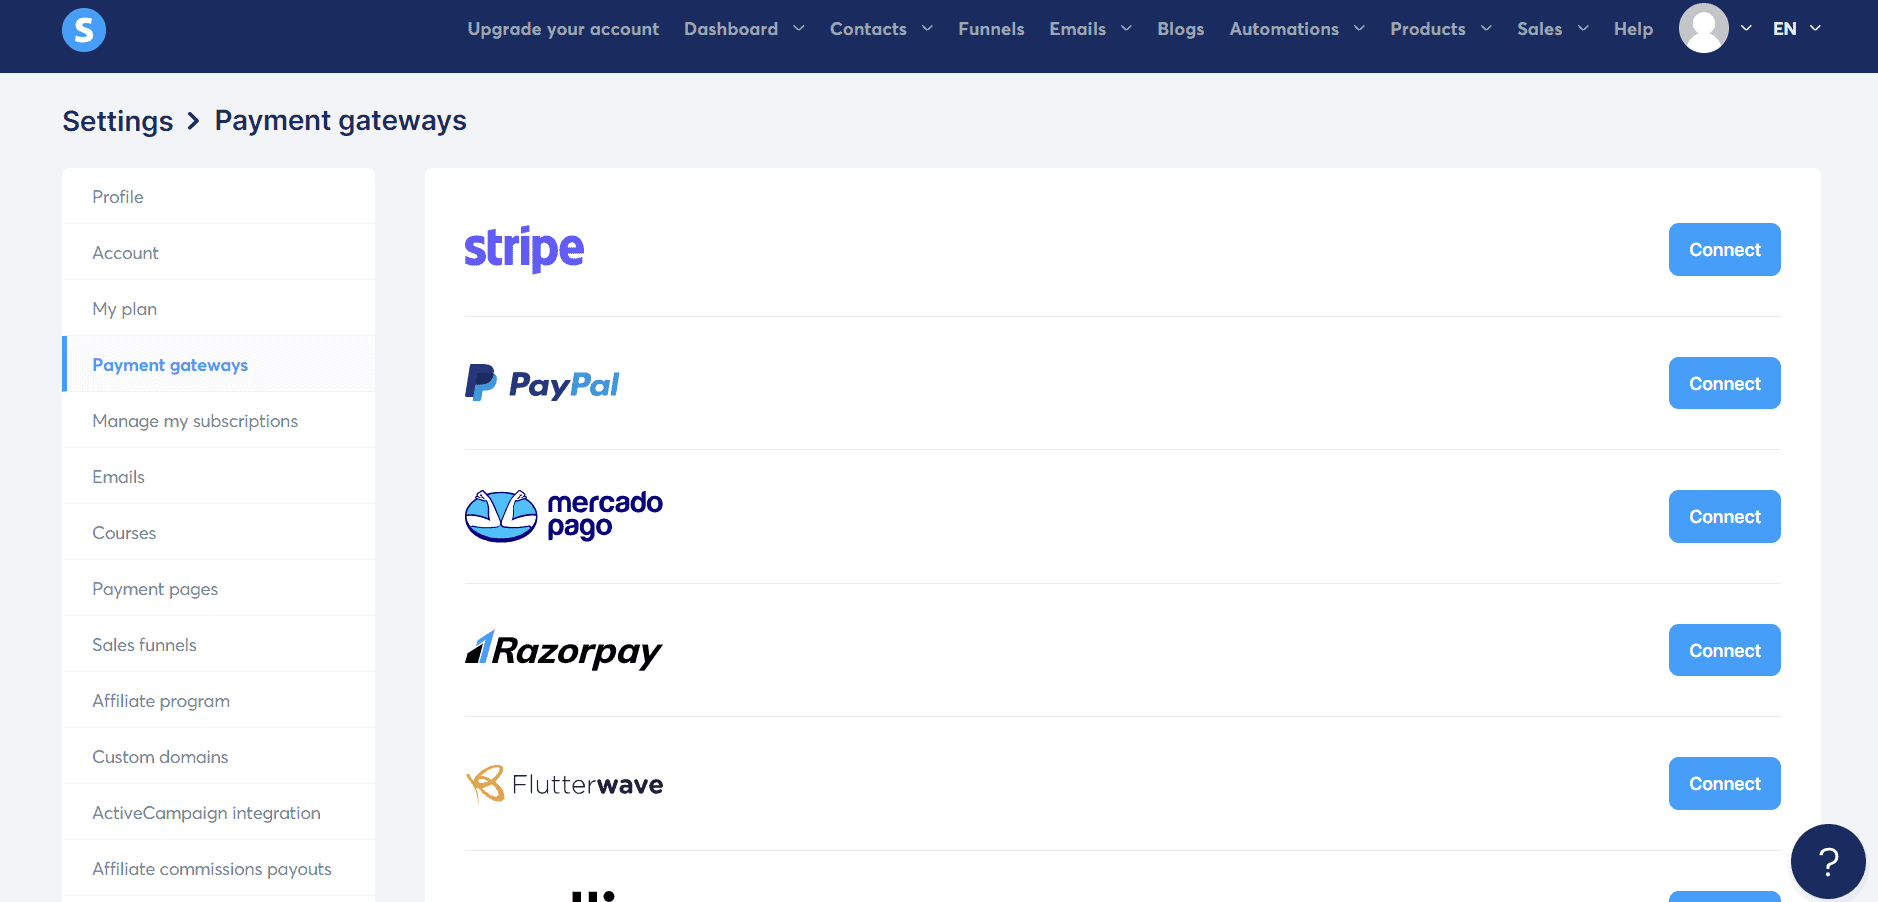
To link your PayPal account, go to “Profile,” then “Settings,” and select “Payment Gateways.” Click “Connect,” enter your API details, and hit “Save” to complete the integration.
Systeme.io excels in team management and hosting an online workspace through its assistant accounts. This feature is simple and inclusive, enabling you to build and collaborate with a full team on the free plan.
Assistant accounts are meant for adding team members, and you can add as many as you want from the start of the free plan.
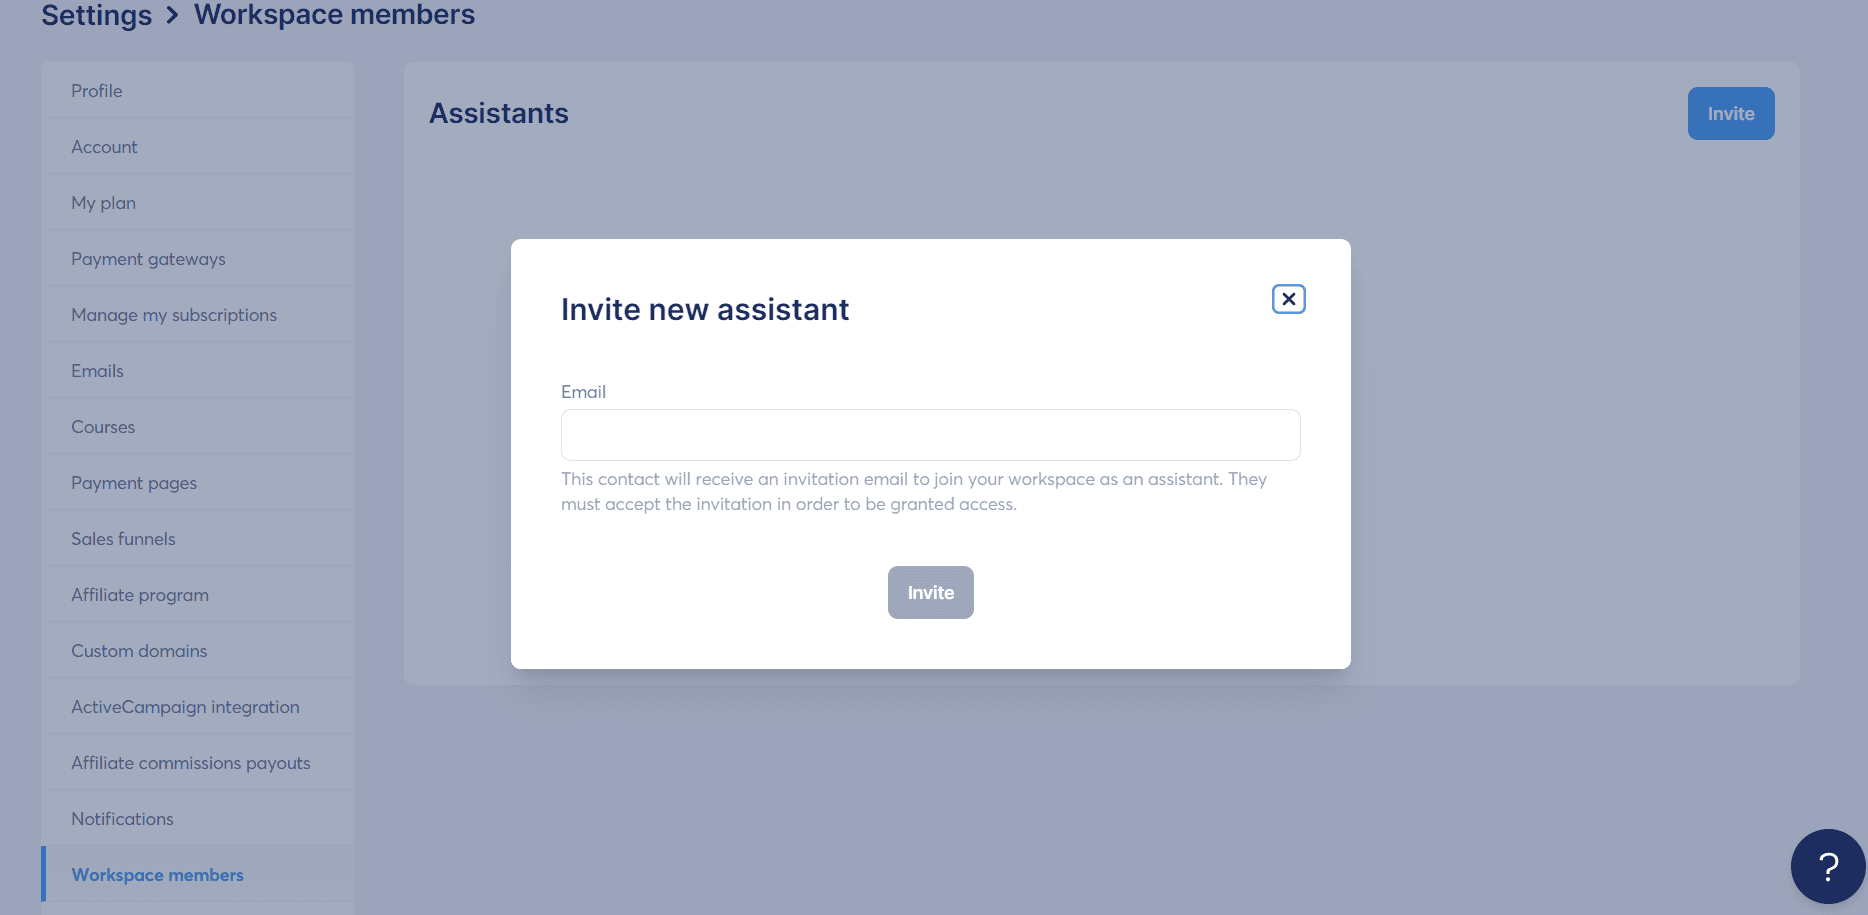
Inviting assistants to Systeme.io is straightforward—just click “Invite,” enter their emails, and they’ll receive a join link. They have the same access as you, and you can give them admin rights.
While Systeme.io offers many features, it lacks granular permission controls, which can be a risk. As security and role definitions become more important, the platform should enhance user controls in future updates.
Individuals have the opportunity to become part of the Systeme.io affiliate program. However, it may come as a revelation that within this platform, one can not only participate as an affiliate but also establish a customized affiliate program tailored to individual needs. Affiliate programs stand as a widely embraced marketing strategy employed by enterprises to amplify the reach and recognition of their products. A distinctive feature contributing to the appeal of these programs lies in the absence of any obligatory upfront investments.
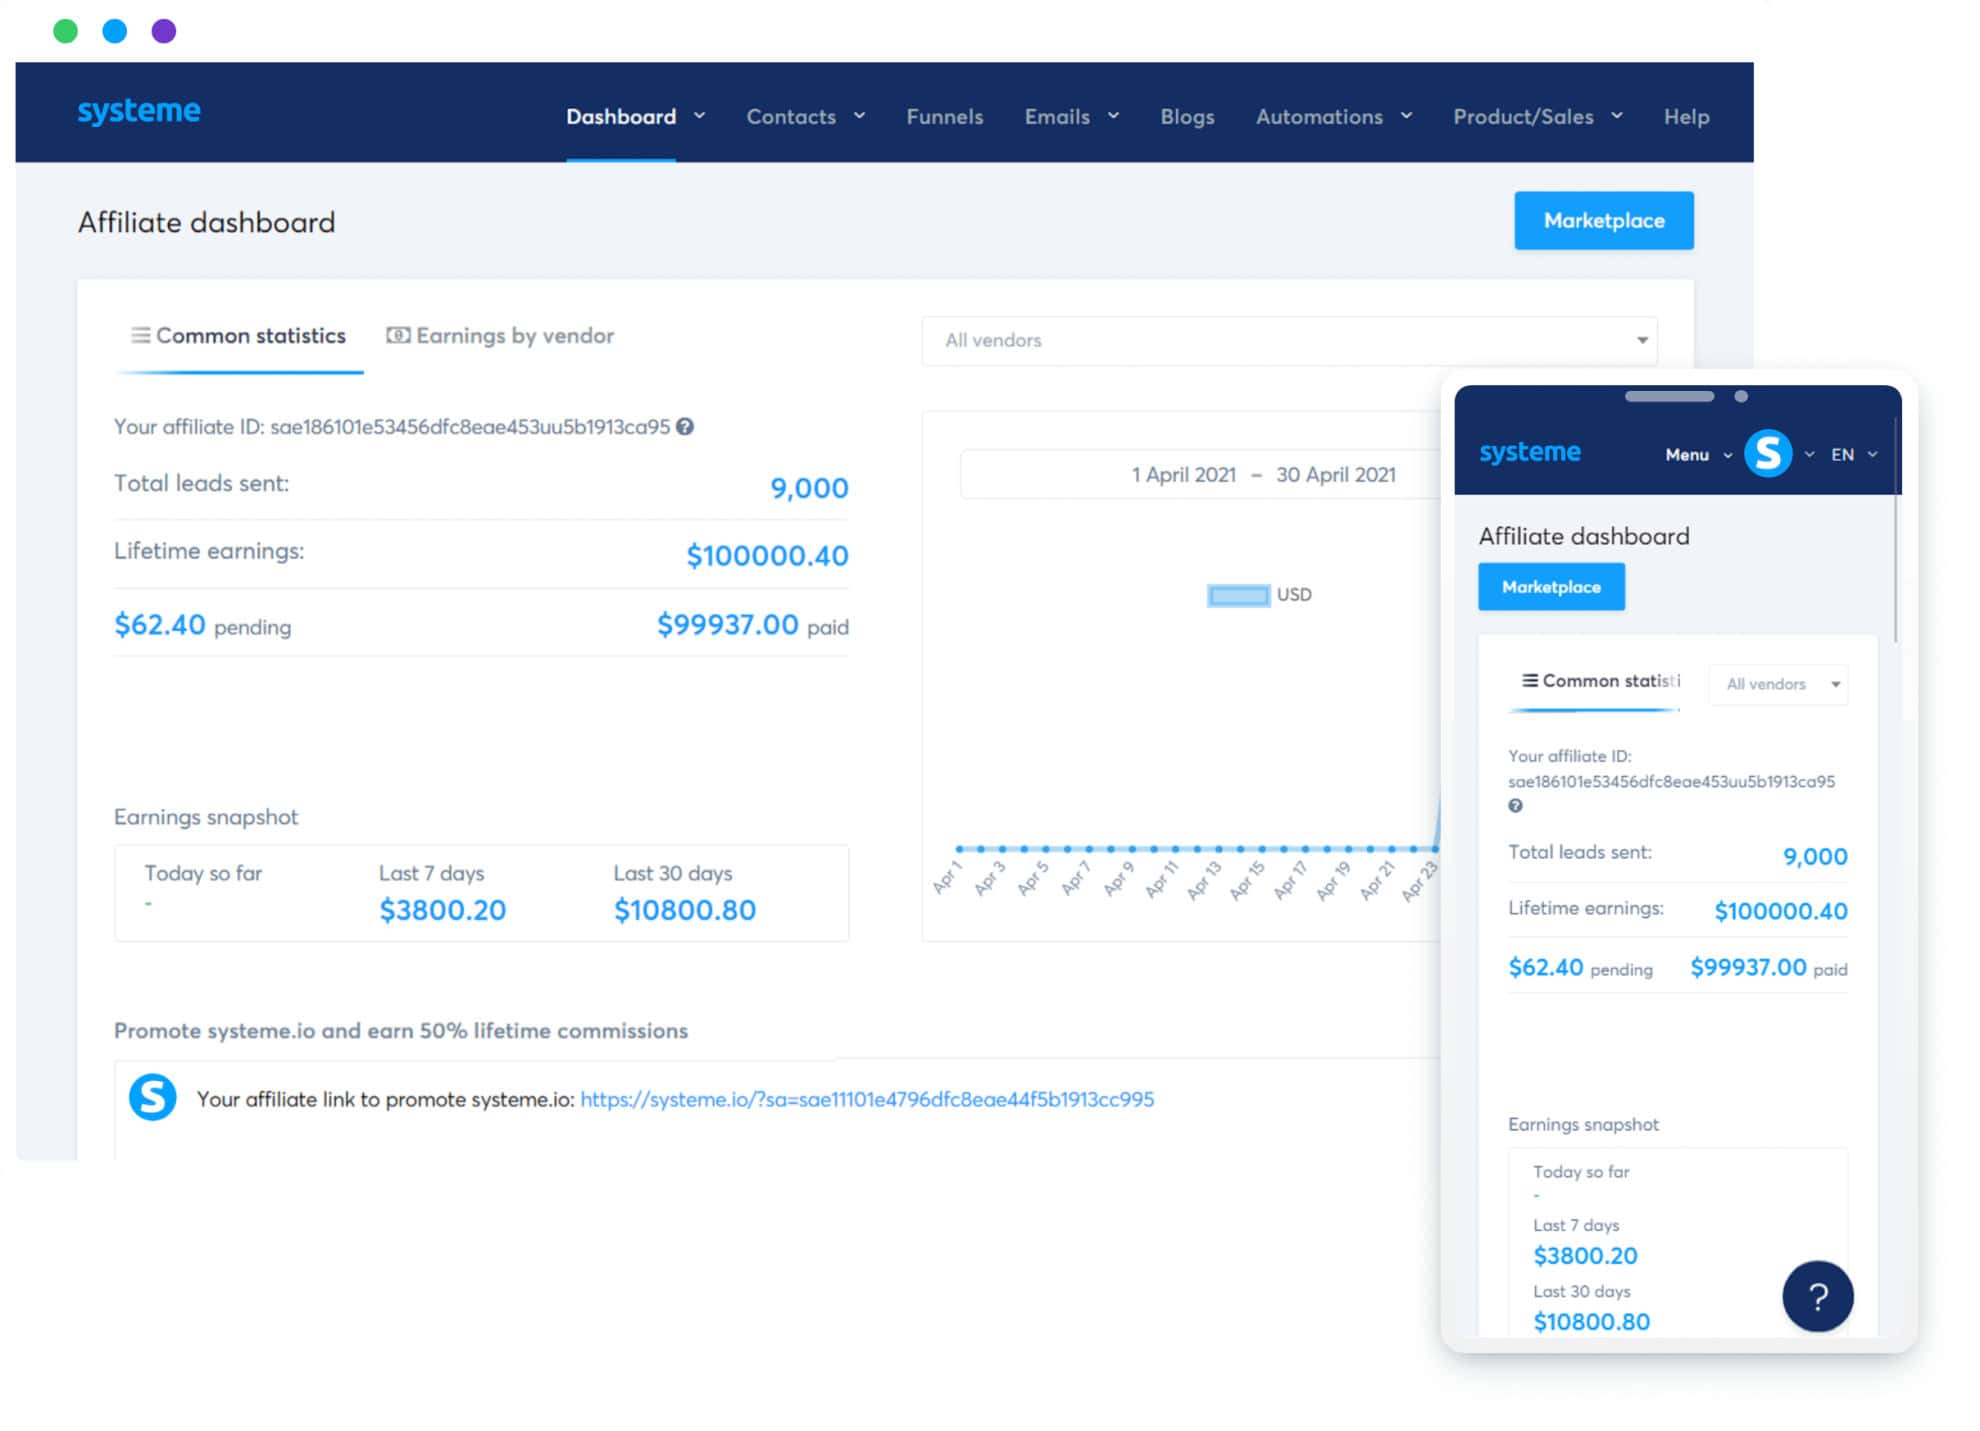
You can use Systeme’s default settings for a straightforward implementation. For those seeking customization, Systeme.io provides an easy way to adjust affiliate program settings by navigating to Main Menu > Settings > Affiliate Program. Here, you can fine-tune commission rates, payout dates, and minimum payout thresholds to suit your business needs.
Systeme.io boosts revenue with two main features: Bump Order and Upsell.
Bump Order offers automatic discounts at checkout, making purchases more appealing by leveraging customers’ preference for discounted high-priced items.
The Upsell feature encourages additional purchases, like suggesting a soda when ordering a burger and fries on platforms like Uber Eats. This tactic prompts customers to consider adding extra items right before completing their order, increasing overall sales.
Systeme.io and ClickFunnels both offer features like sales funnels and automation, but differ in pricing.
| Business Tool | Starting Price | Free Version | Email Contacts | Sales Funnels | Blogs | Automation Rules | Affiliate Program |
| Systeme.io | $27/month | Free Forever | Starting from 2,000 to unlimited | Available | Available | Available | Available |
| ClickFunnels | $127/month | 14-free trial | 10k to 200k contacts | Available | Available | Available | Available |
Systeme.io has a free forever plan, while ClickFunnels only offers a 14-day trial, making Systeme.io better for small businesses.
In paid plans, Systeme.io is $100 cheaper and allows unlimited email contacts, unlike ClickFunnels, which limits users to 10,000. Overall, Systeme.io is a more cost-effective choice.
For the detailed comparison, you can check out our Systeme.io vs ClickFunnels.
If you are new and do not know how to use Systeme.io, please follow our instructions below.
Initially, you need to visit the official website (www.systeme.io) to create a new account. You will receive a verification request via email, and after verification, you need to log in again to go to your admin interface.

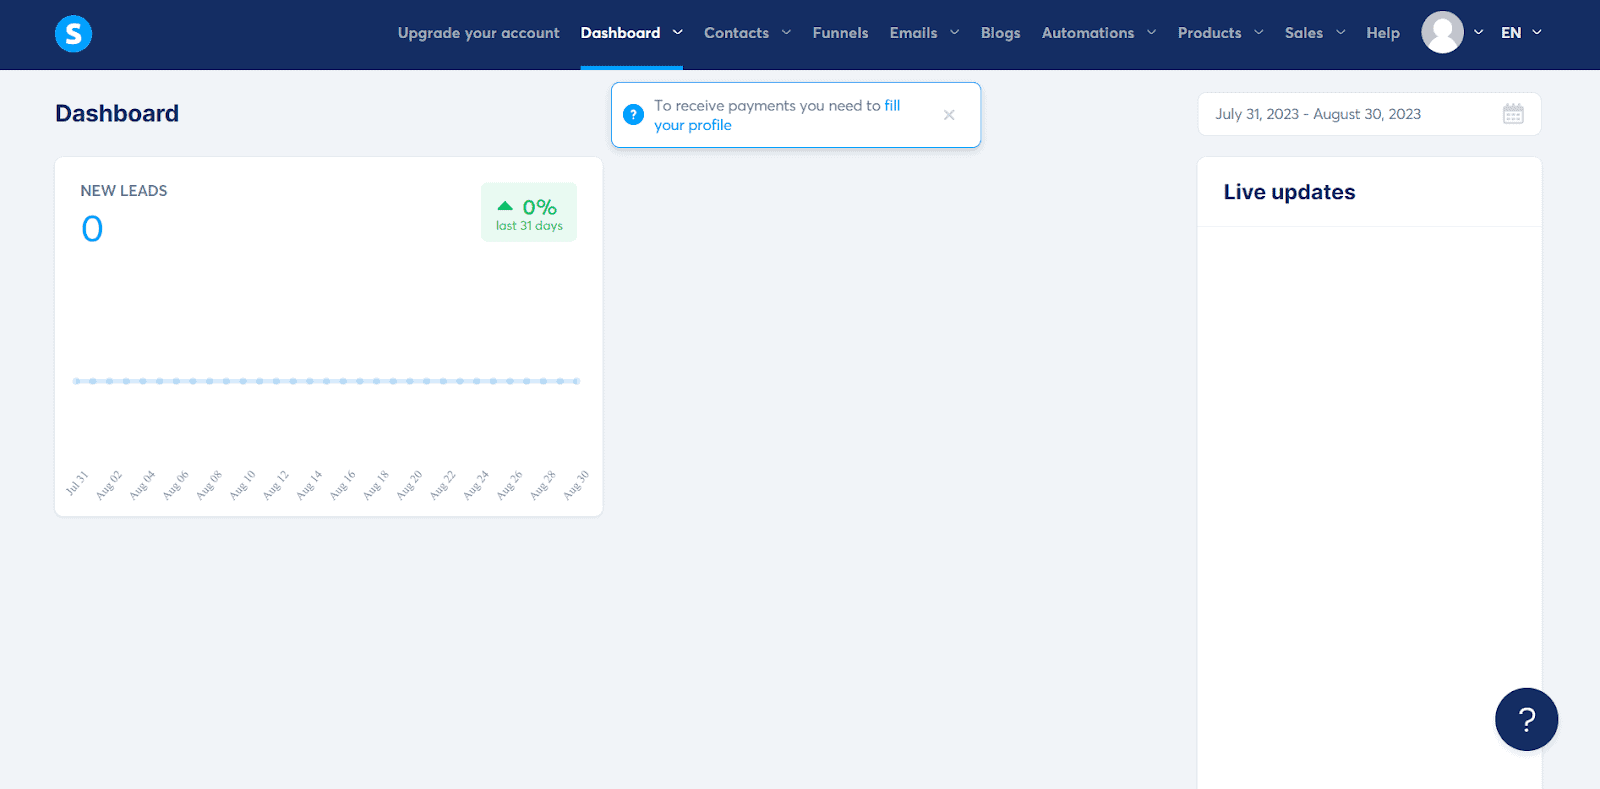
After being granted access, the first page you see is a blank dashboard without any data. The data will be updated as your business operates. Here you can also see all the important updates.
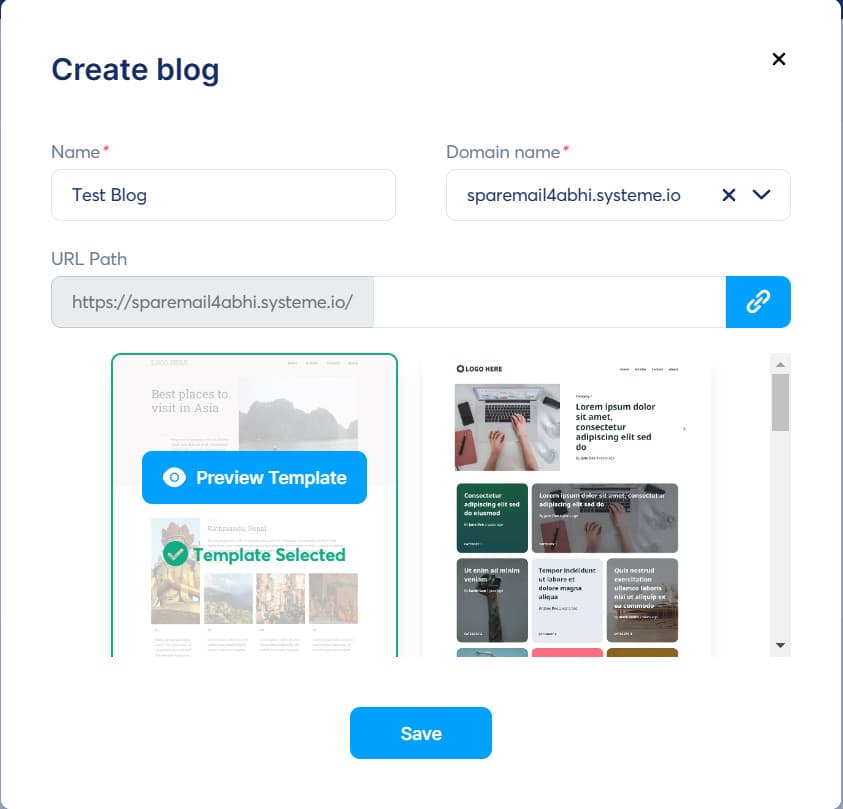
To create a new Blog, select “Blog” in the top menu bar. Then in the left corner of the screen, click the “Create” button to start creating a Blog.

After clicking “Create”, a new window will open. Here, you need to enter your Blog title and domain name and choose your favorite Blog template. Once created, you will see a Blog section on your dashboard.
To access the Blog page and article page, click on the Blog title as shown in the image below.
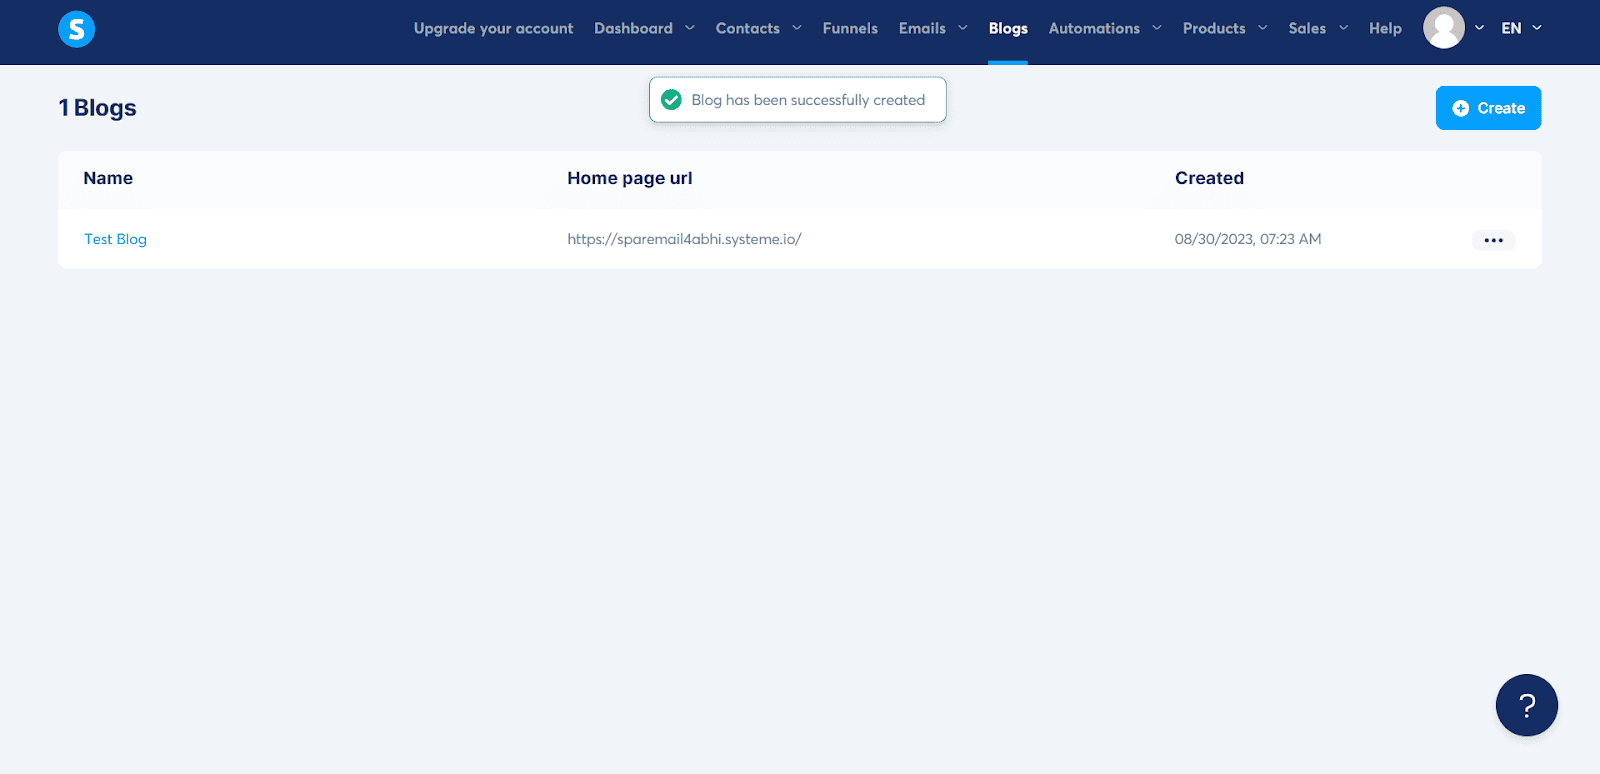
Using the options located at the top right, you can customize the visual appearance of your blog, access its settings, and preview it by clicking the ‘View Blog’ button before making your first post public.
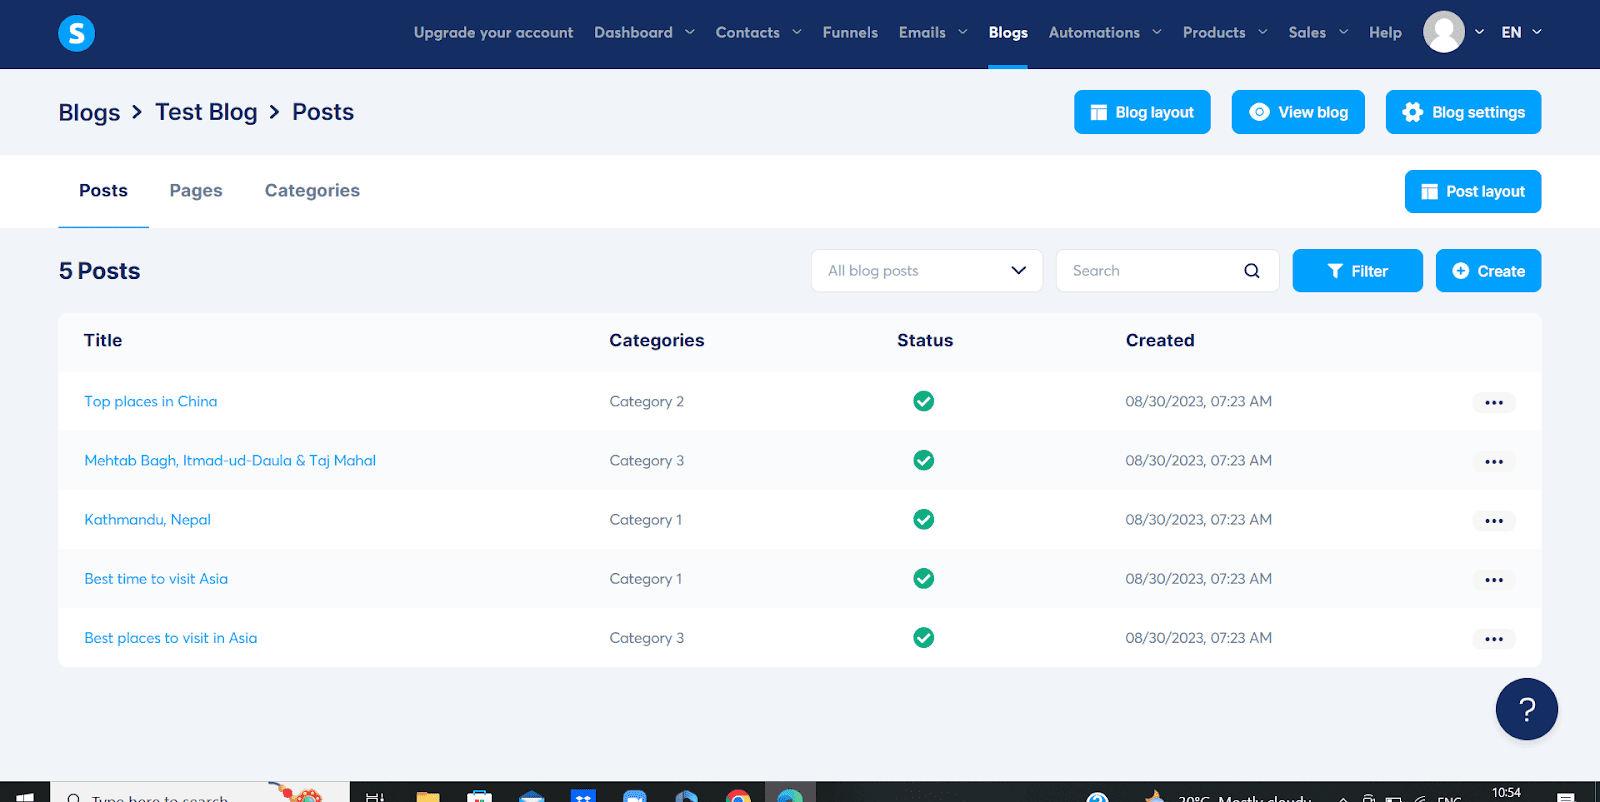
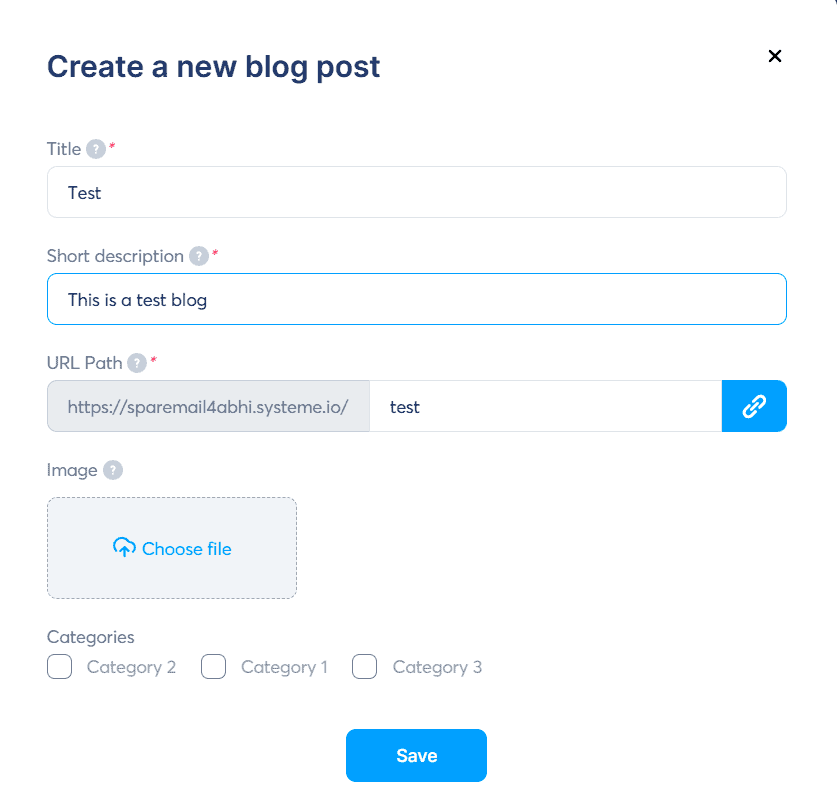
To generate a fresh post, simply click on the “Create” button. Proceed to input the post particulars, including the title, description, URL, and image. You also have the option to establish distinct categories for your blog within this section. Upon completing these steps to your satisfaction, don’t forget to click on “Save.”
At this point, the Blog will display a list of your posts and post templates. Your job now is to type in the name of that article and start editing. The image below will help you better visualize the interface of this editing page:
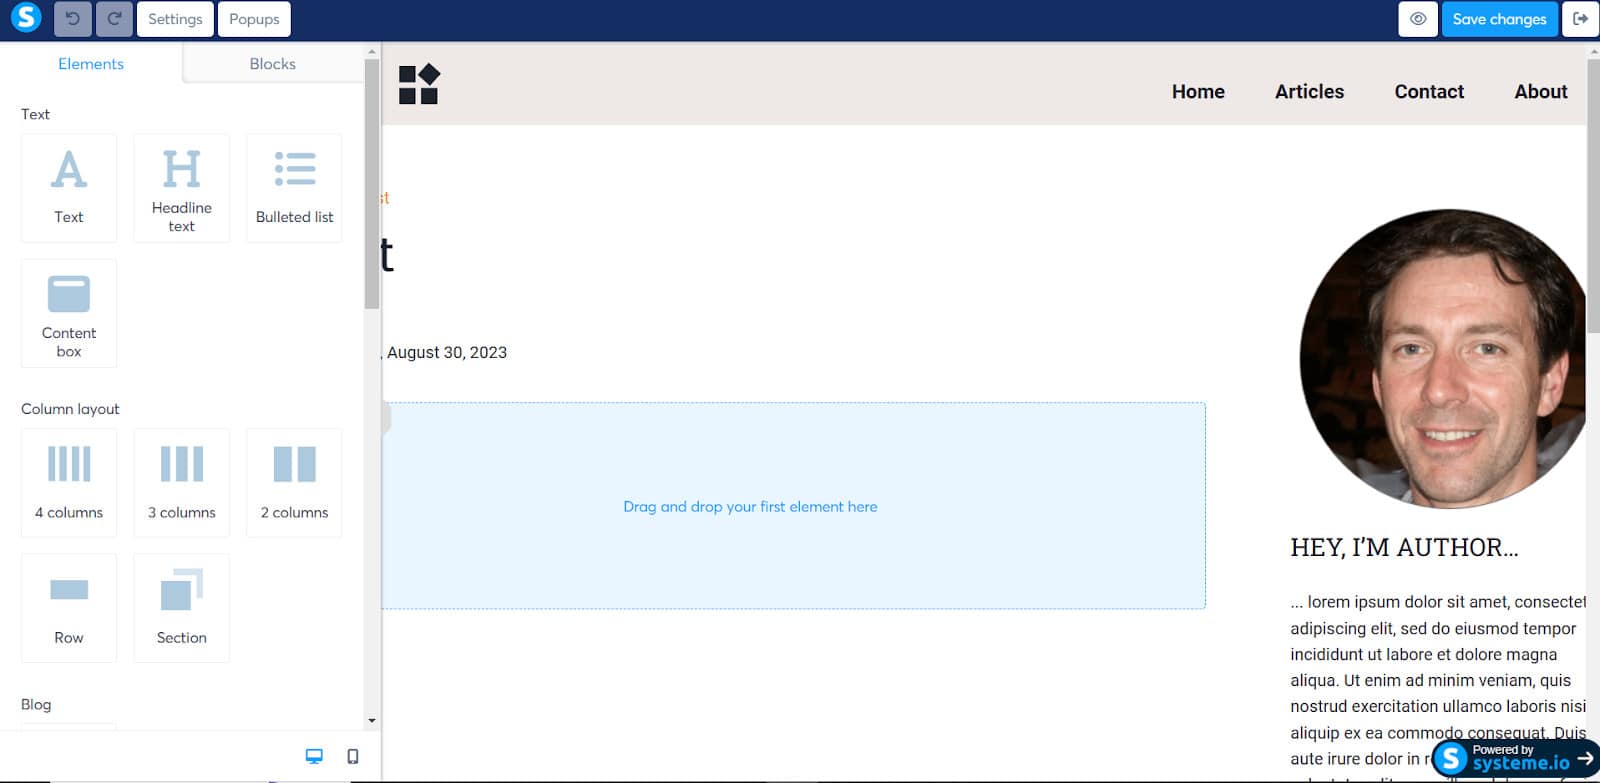
On the page’s left side, you’ll find widgets that empower you to tailor the elements within your post. Options include a content box, heading, social share button, or FAQ section – all fully customizable. Simply select your preferences and effortlessly drag and drop them into position. Once contentment is achieved, hit “Save Changes.”
Navigate back to the posts list page. Locate the three dots adjacent to your latest post’s name, and opt for “Activate” to promptly publish your post.
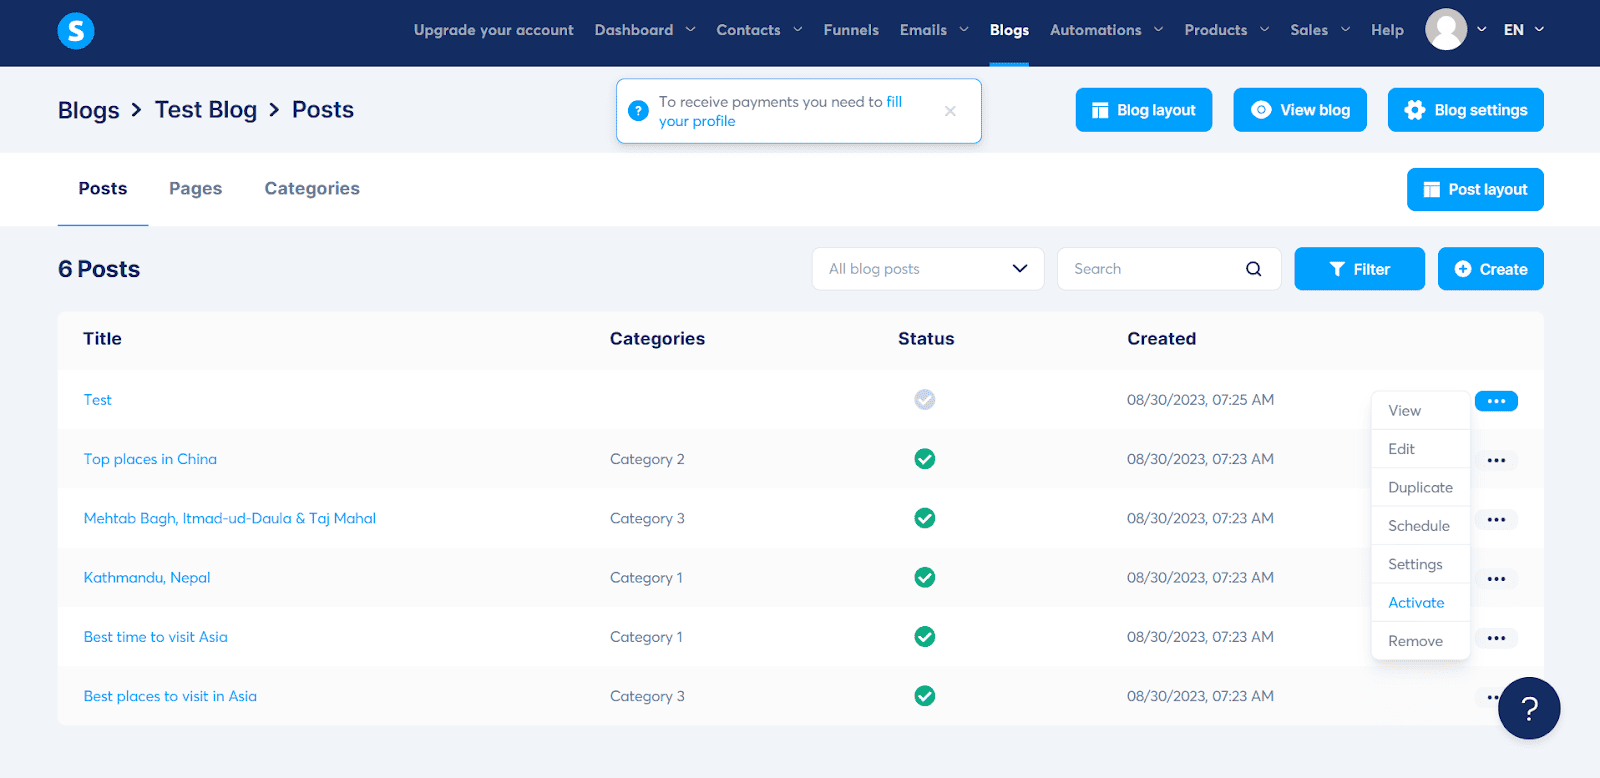
To establish your online store, adhere to these steps. Begin by navigating to the dashboard and selecting the “Products” option from the top header menu.
Next, choose the product type you intend to sell. It could be a physical item, coupon, course, or any other offering. For this guide, we’ve opted for physical products.
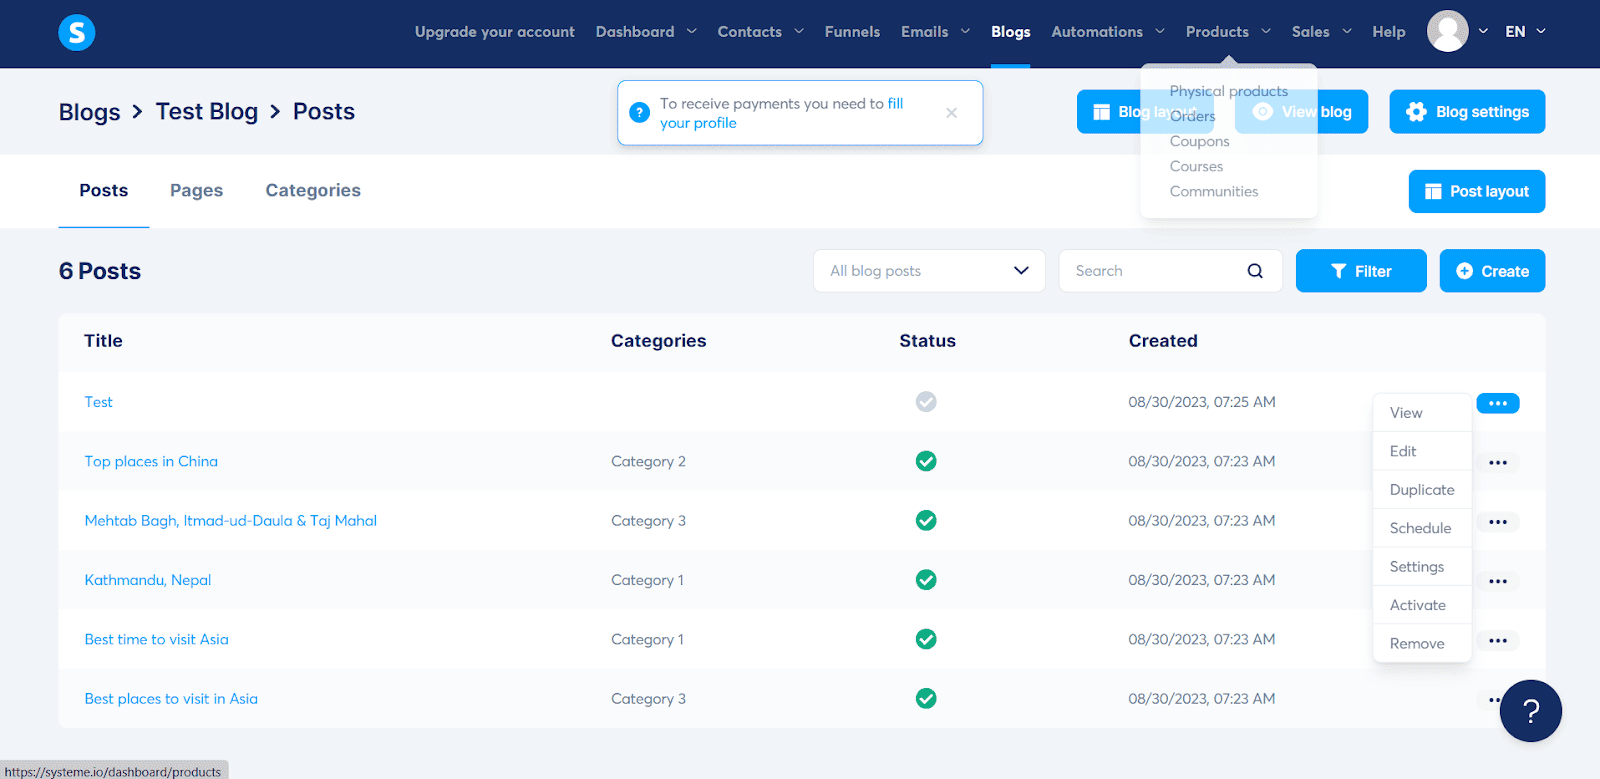
Now, similar to the blog page, locate the “Create” button in the top-right corner of the screen. Click on it to introduce a new product. In this guide, we’ve already generated a test product for your reference.

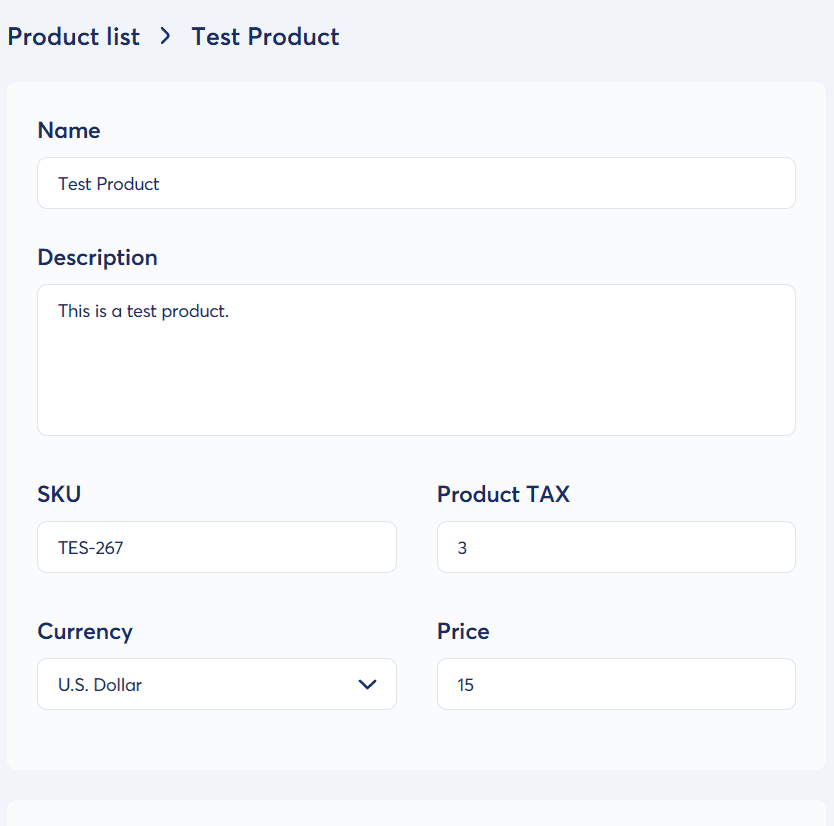
A fresh window will appear, allowing you to input product details such as the name, description, tax information, price, and preferred currency.
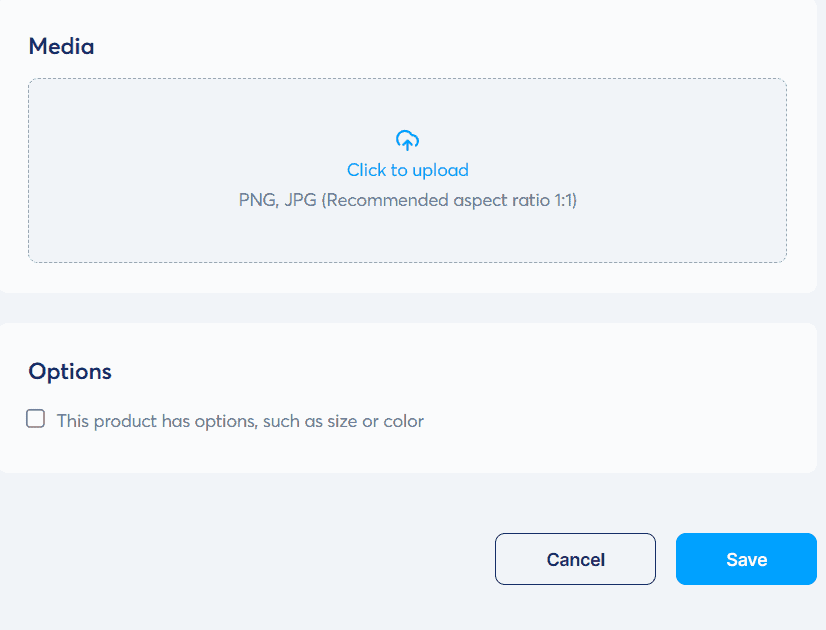
Continue scrolling down, and you’ll come across the choice to include an image. If the product offers various options, such as diverse sizes or colors, tick the “Options” box located towards the page’s end.
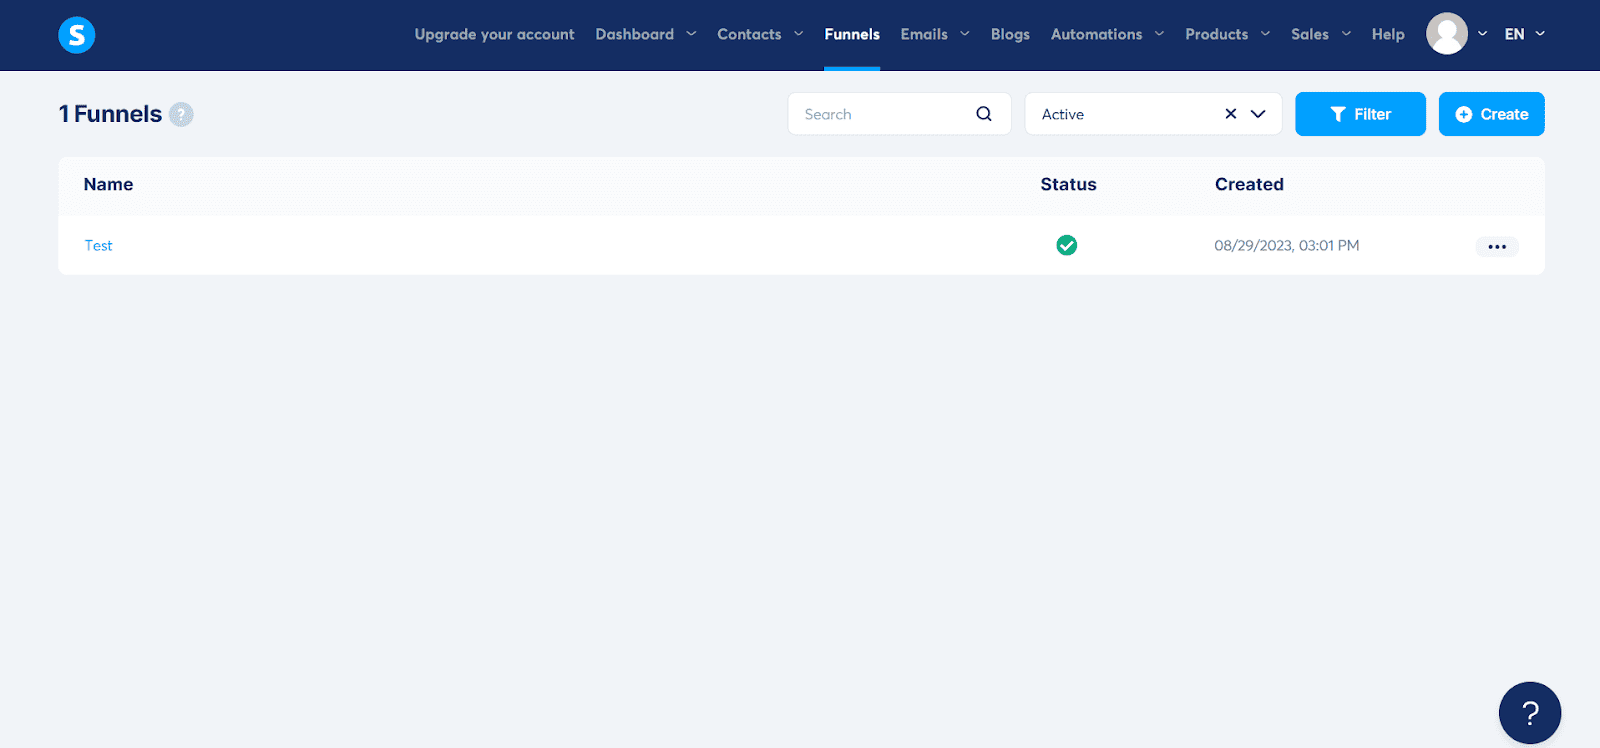
Now that your product is established, you need a channel to attract customers. Here’s a step-by-step guide for you: Start by selecting the “Channel” option in the main menu and then click “Create.”
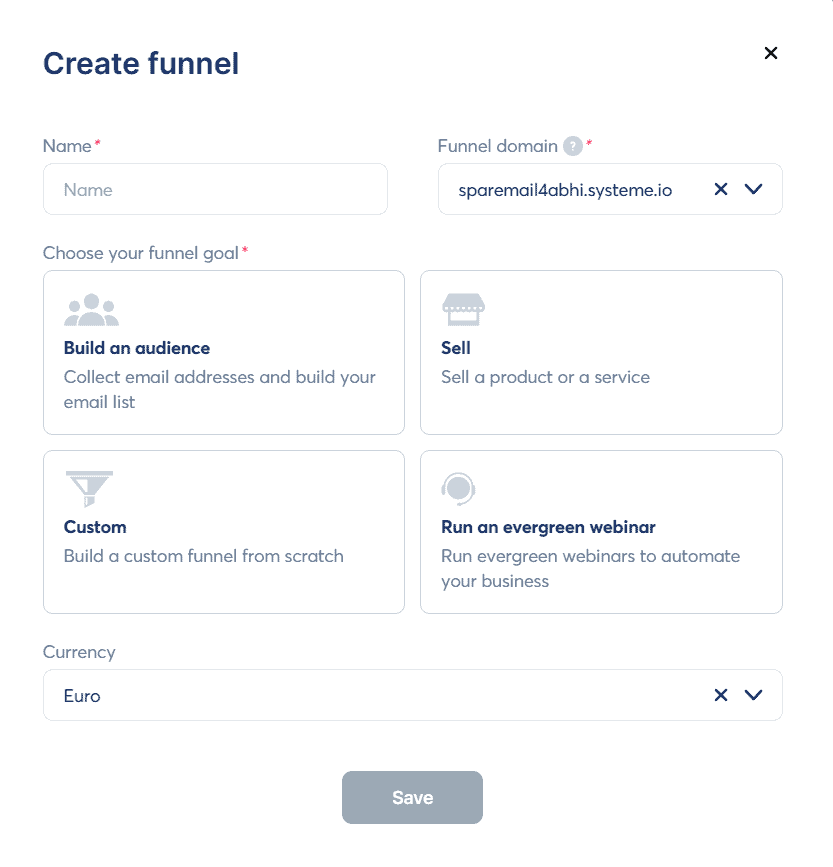
In the following window, input the funnel name and domain and specify your goal. In this instance, our objective is to promote the product created earlier. Select your preferred currency and click on “Save.”
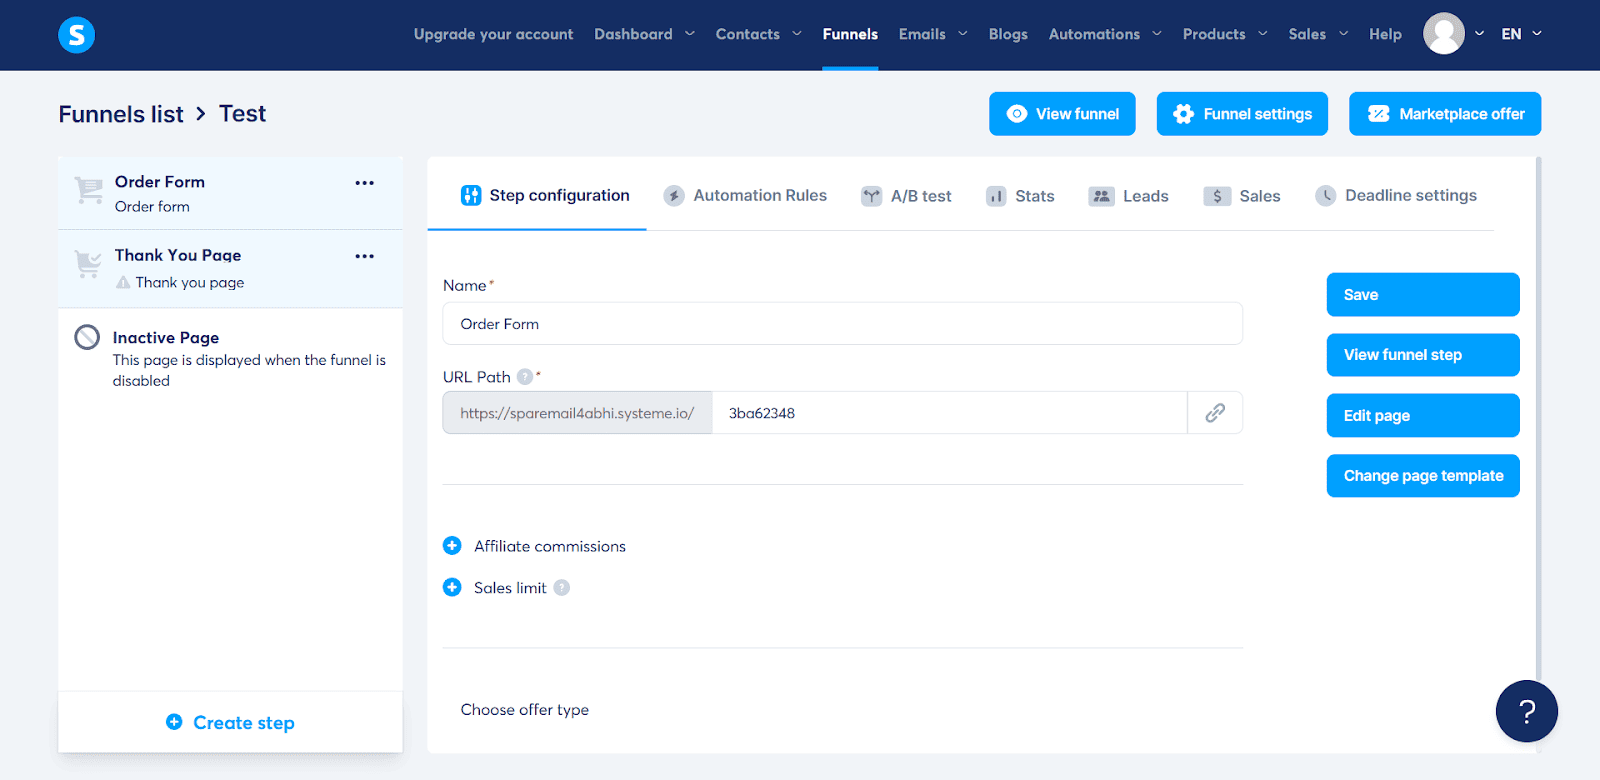
Now, this marks the commencement of the enchantment. Firstly, establish a page where customers will be directed to your product. It might take the form of a pricing page, shopping page, or discount page.
Regardless of the template you opt for, additional information needs to be incorporated, as illustrated below.
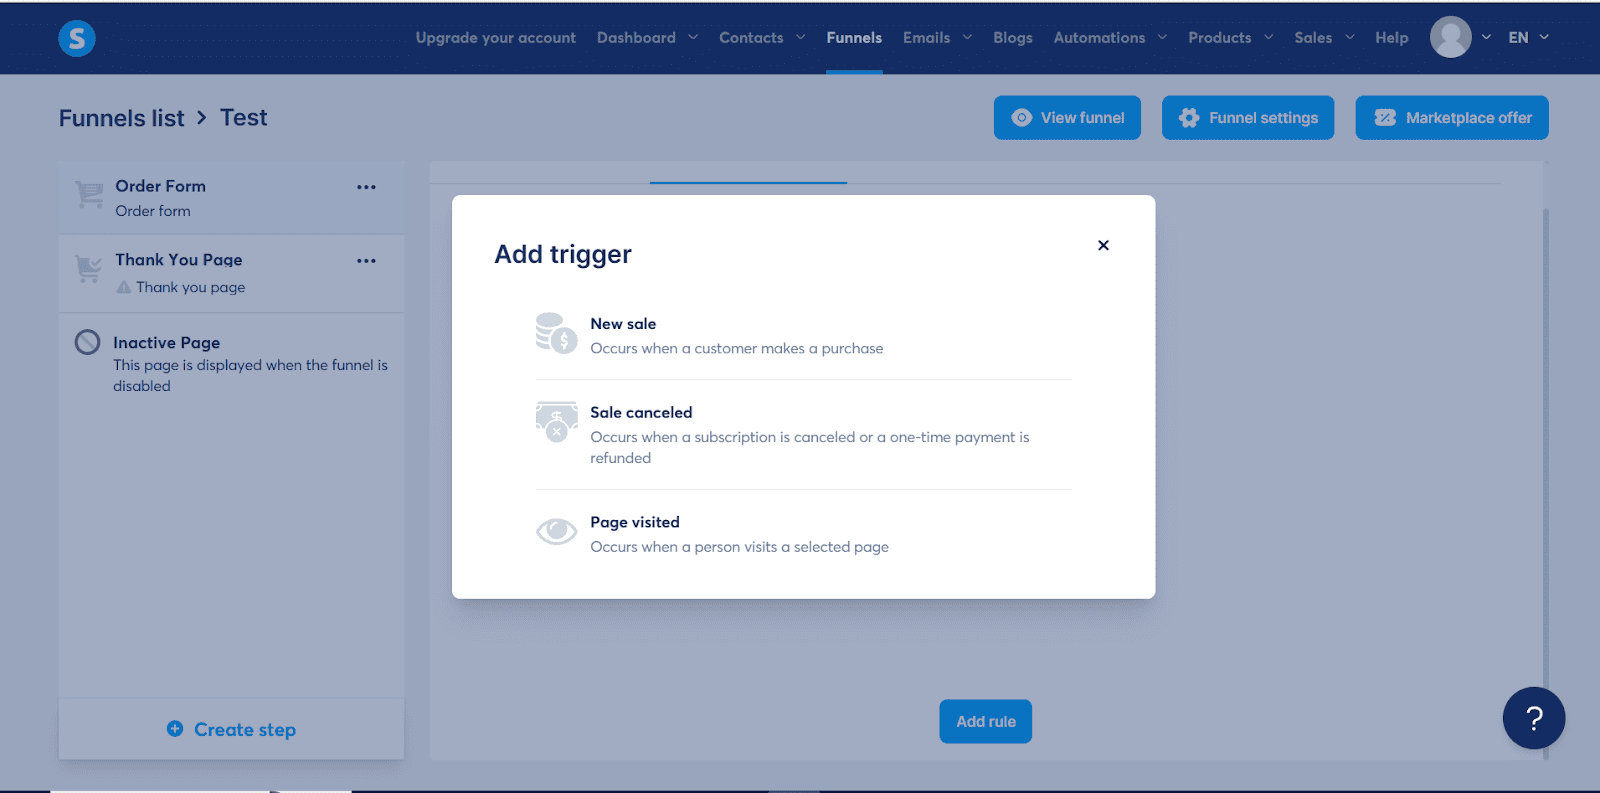
Following that, you have the option to incorporate automation rules if desired. Integrate a trigger, and subsequently append an action to accompany it.
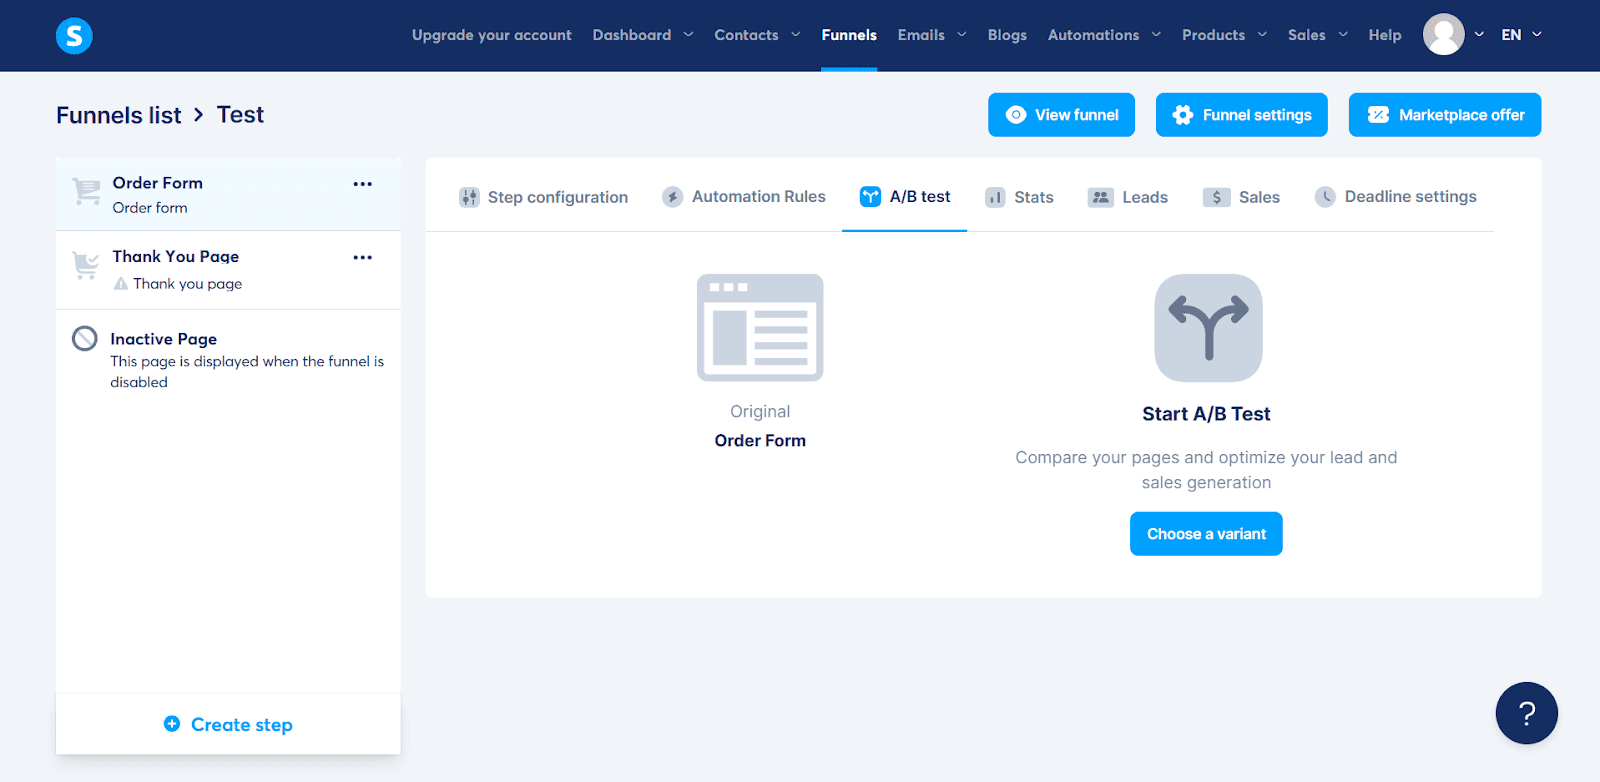
Following that, you have the option to initiate an A/B test. Essentially, you generate an alternative version of the page created earlier and simultaneously launch both to evaluate their respective performances and determine which one excels.
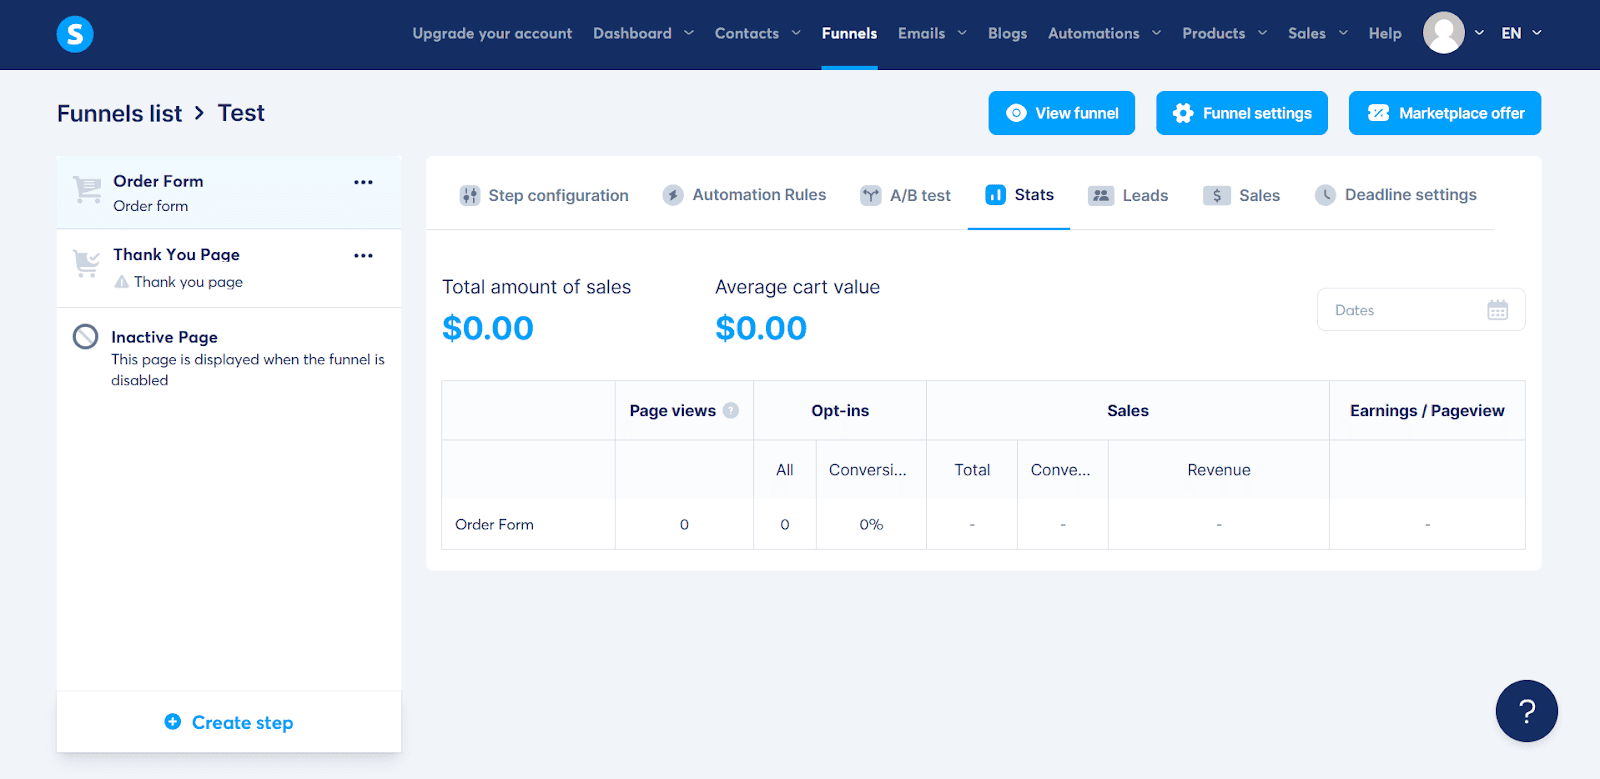
The subsequent option is “Stats,” essentially providing a preview of the template designed to offer insights into your sales and performance.
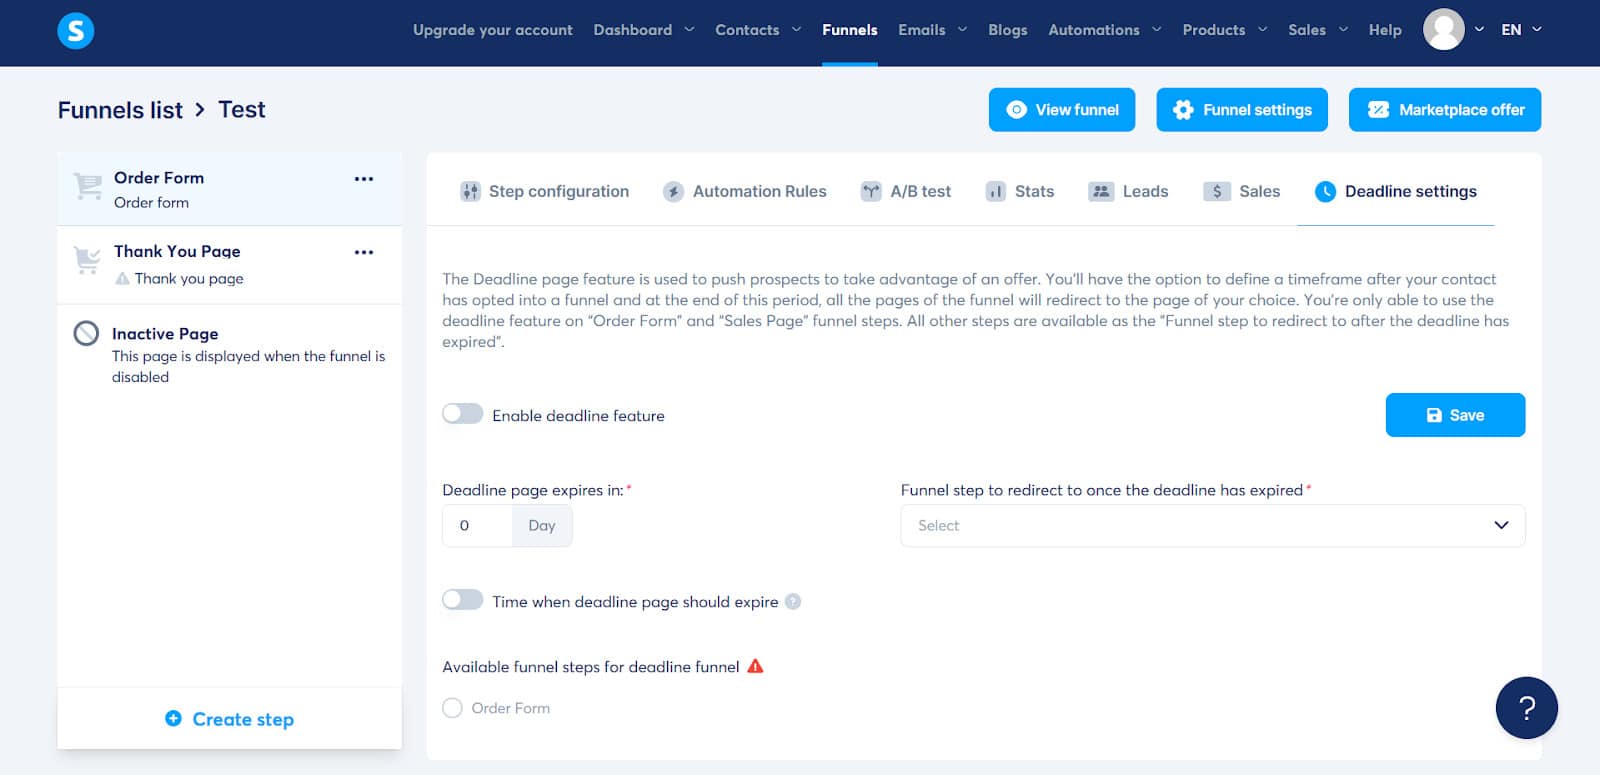
The subsequent choices, namely “Leads” and “Sales,” become operational once you’ve launched a product, generating leads. The final option is “Deadline.”
This feature allows you to present a time-sensitive offer on your products. Once the designated period concludes, Systeme will autonomously revert to the original prices.
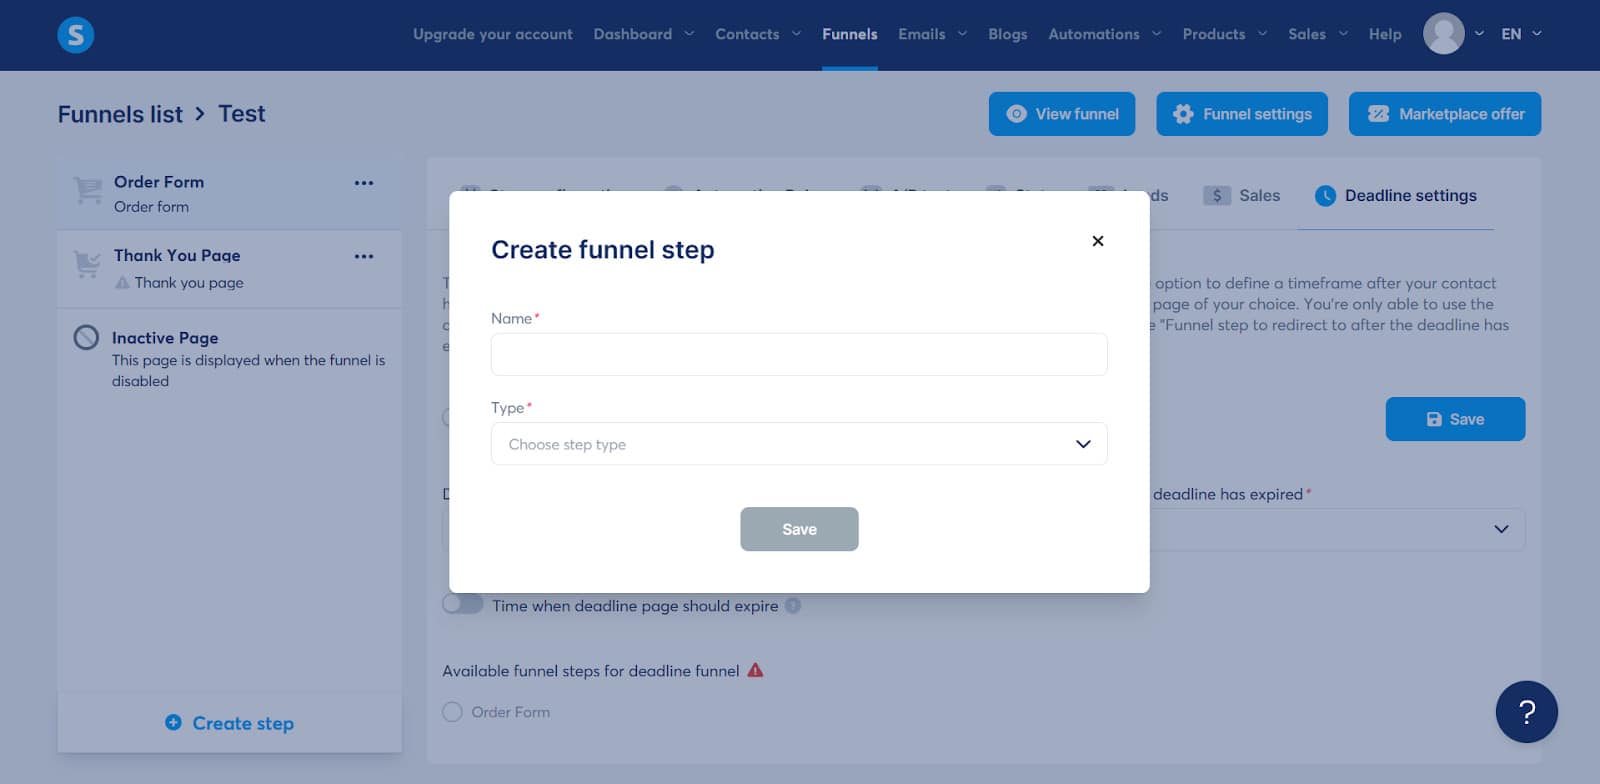
These steps are pre-set for your convenience. However, you have the flexibility to generate a new step based on your preferences. Simply click the “Create” button located at the bottom-left corner of the screen.
If you’re looking to kick off an email campaign or deliver a weekly newsletter to your audience, here’s the straightforward process to follow. Begin by clicking on “Emails” in the top header menu.
Next, determine the type of email service you wish to use. In this guide, we’ve opted for newsletters. As is consistent with the Systeme.io platform, locate the “Create” option on the subsequent page to initiate the process.
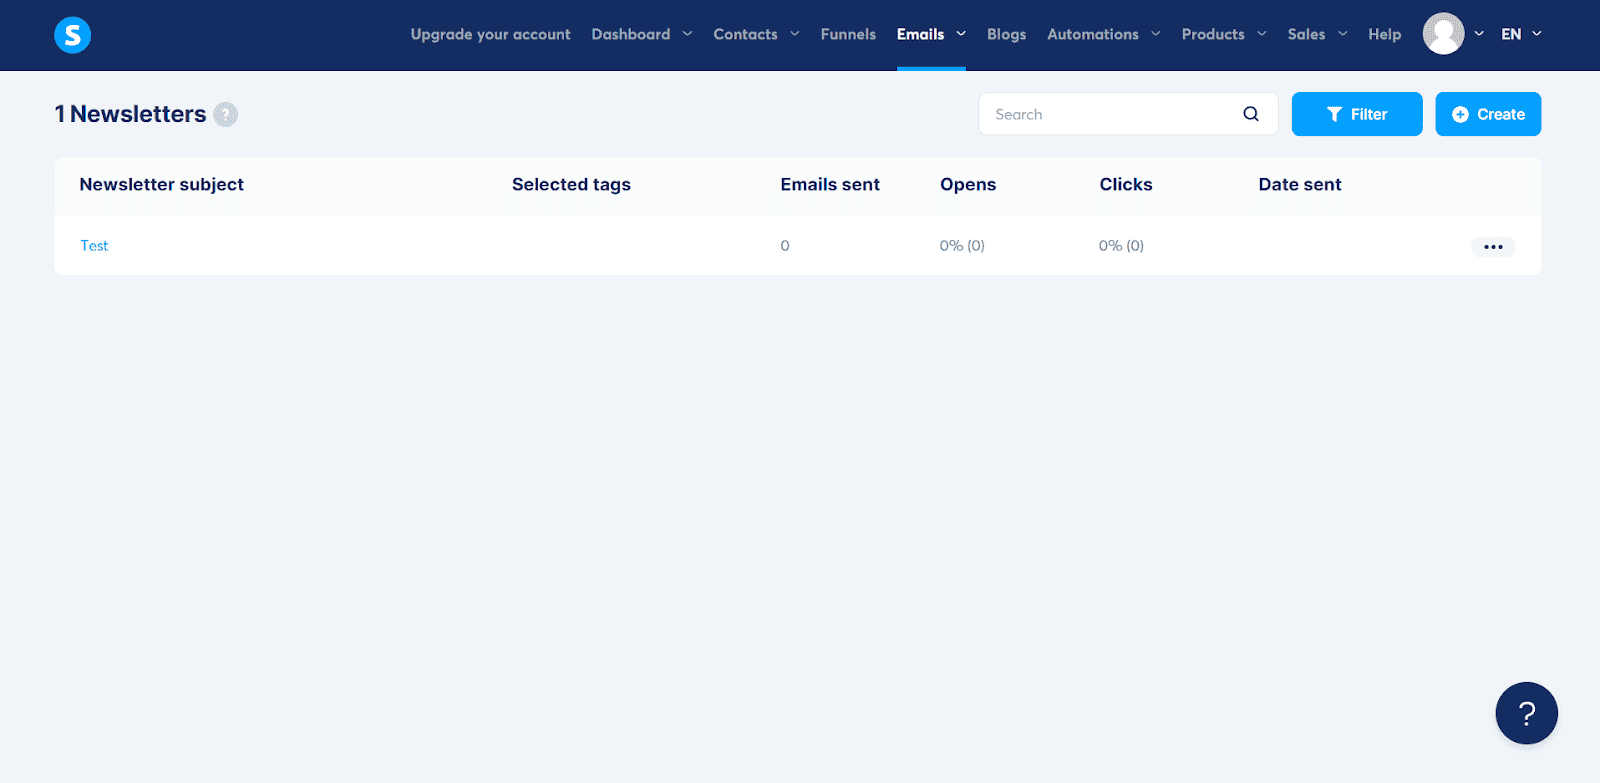
Upon clicking this option, a new window will appear prompting you to choose an email template and input the sender’s name and email ID. After saving, you’ll observe a newly added email form in the list.
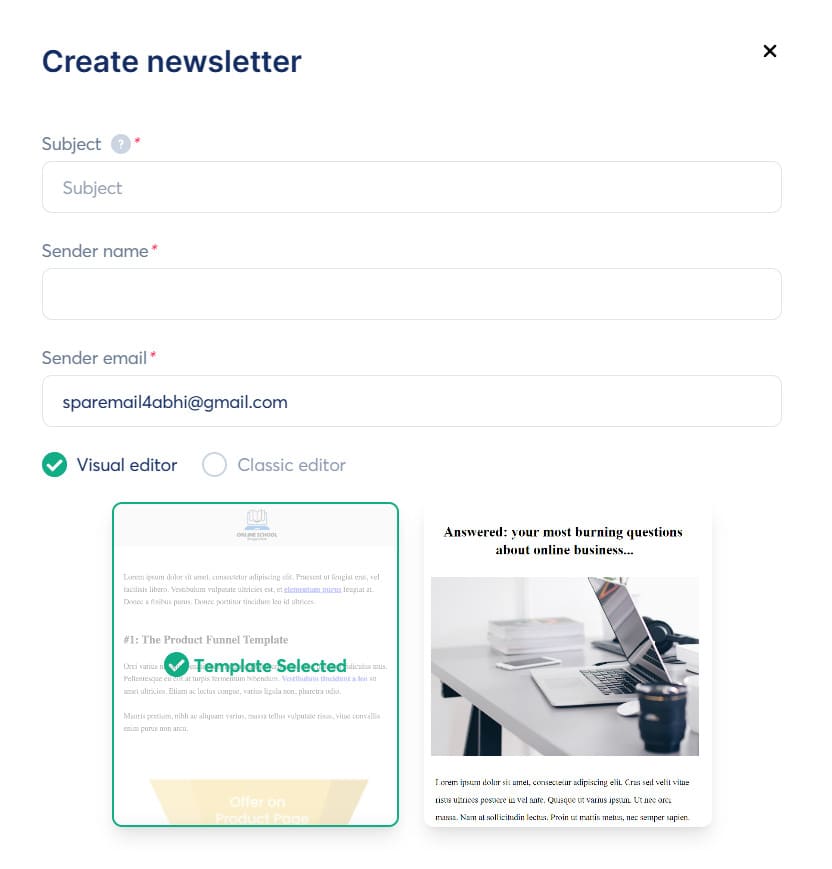
Click on the email’s name to access the editor. Input your email content and choose the contacts you wish to send it to from the menu on the right-hand side. With just a single click, each recipient will promptly receive your email.

These represent the fundamental features of Systeme.io, yet there is a wealth of additional knowledge to explore. Fortunately, they provide an extensive knowledge base with tutorials that guide you in unlocking the full potential of this platform.
Our reviews stand out because we invest hours in personally testing the software. We also gather insights from users via their feedback, exploring third-party review sites like G2 and TrustPilot to understand the sentiments surrounding Systeme.io.
To assess the software’s long-term performance, we didn’t just focus on recent users but also included perspectives from long-time users. Our comprehensive evaluation involved extensive testing of the free plan, scrutinizing features like Sales Funnels and Email Marketing based on user-friendliness, responsiveness, and functionality.
By comparing Systeme.io with competitors like ClickFunnels and HubSpot, we aimed to provide a detailed review incorporating diverse viewpoints, ensuring it is valuable to most users.
Systeme.io stands out as the ideal, cost-effective business tool you’ve been searching for. Packed with features such as automated email marketing, a user-friendly sales funnel builder, A/B testing capabilities, and unlimited blog posts and file storage on every plan, including the free one.
With a multitude of positive reviews, Systeme.io empowers you to construct your online store and website effortlessly, providing seamless management through its user-friendly business tools.
Moreover, it boasts an extensive database of helpful articles that walk you through each step of the supported business processes. In case you encounter any challenges, their responsive customer support and an engaged Facebook community are readily available to assist you.
Systeme.io is the brainchild of Aurelian Amacker, a French entrepreneur who initiated the company in 2017. What adds an intriguing layer to this is that he manages the entire operation through Systeme.io. In essence, he practices what he preaches; his email campaigns, blogs, courses, and every facet of his business are executed using Systeme.io.
Systeme.io is worth it. It’s rare to find tools nowadays that offer such extensive features, minimizing the need for additional software integration. The paid plans are reasonably priced, and you also get a generous free plan to jumpstart your online store, email marketing campaigns, courses, or affiliate program.
Systeme.io is an excellent tool for blogging, making it easy to create and manage a successful blog without the need for coding. Just click on the “Blog” option in the top header, provide a title, choose your domain address, select a template from their extensive database, and click “Save.” It’s a quick process, taking less than 5 minutes. After that, you can effortlessly add pages and customize the template to suit your preferences.

