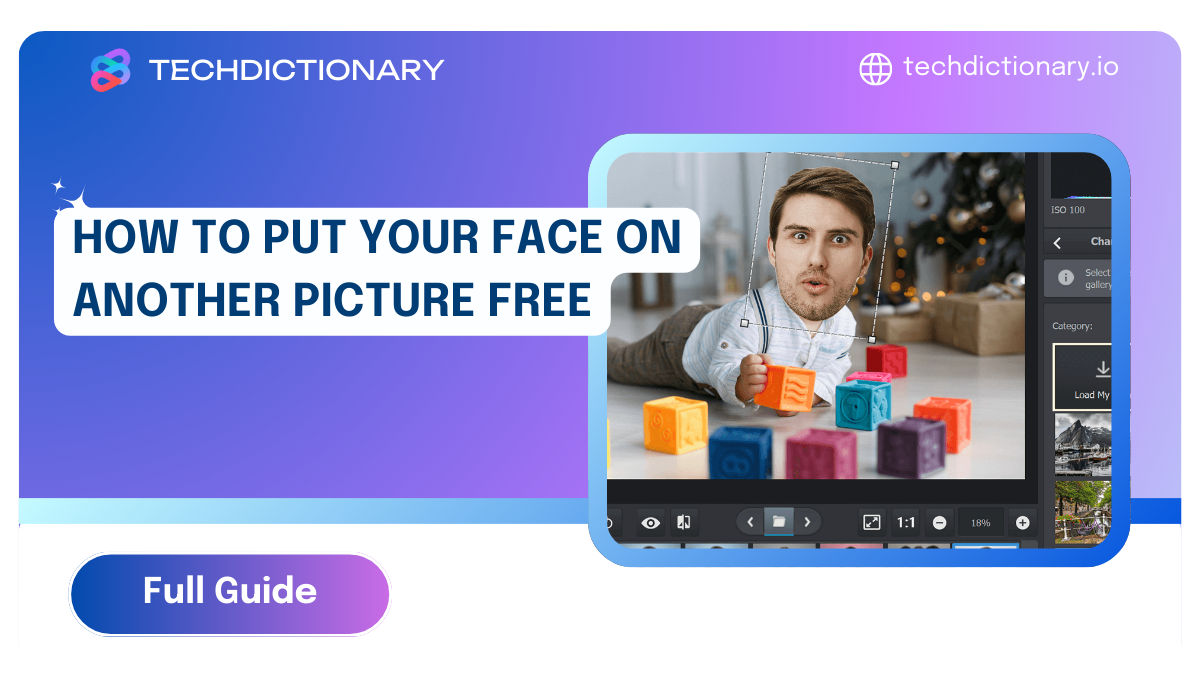
AI is making our everyday conversation more interesting. Face swap is a prime example. As you arrive here, explore our simple guide on how to put your face on another picture.
First hint: Two of the four tools are AI-related, and the others are non-AI.
Second hint: They’re all free. Let’s see which one can help you the most!
Vidnoz is one of the best AI face swap tools, providing high-quality output and the fastest processing times. It offers photo and video face swaps for free online use. But today, we’ll explore its functionality only for photos. The process is really quick. All you need to do is upload pictures and swap. Here’s a detailed guide:
Step 1: Sign up with Vidnoz using your Google, Facebook, Linkedin, or Microsoft account.
Step 2: Navigate a Face Swap tool via Vidnoz AI Face Swap
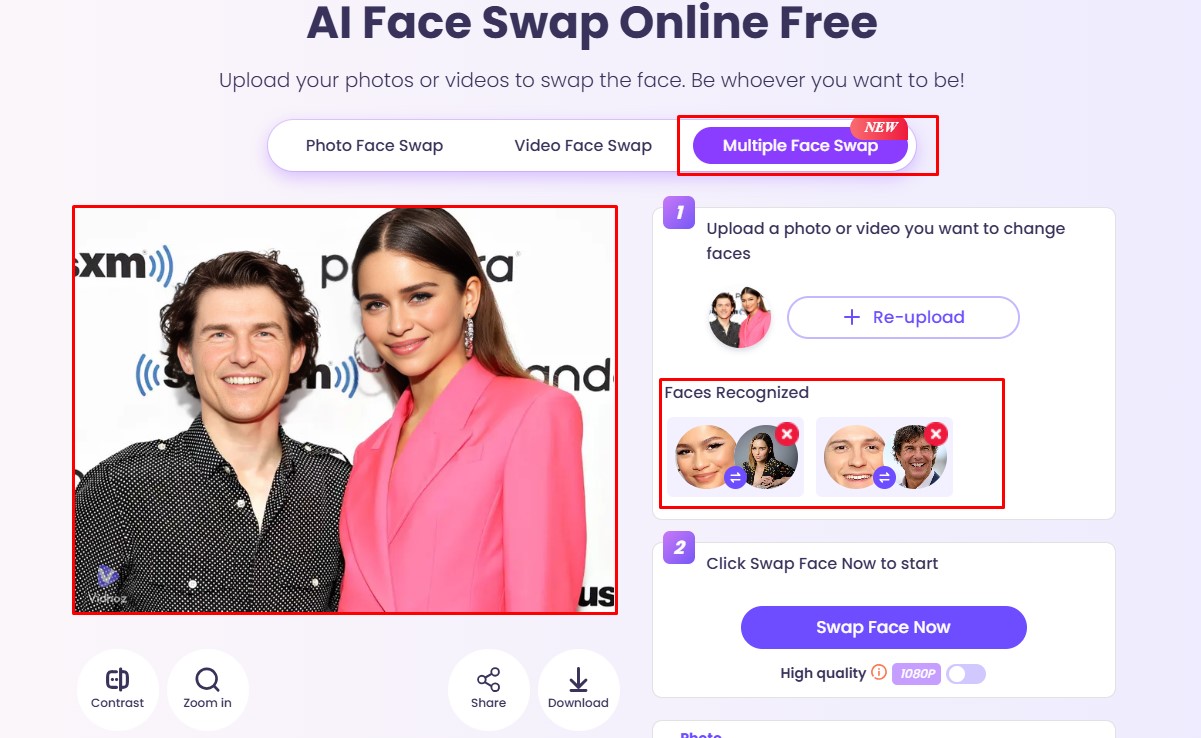
Here, Vidnoz offers two options for photo face swap: single face and multiple faces. You can try both as Vidnoz is free.
Step 3: Upload photos as required
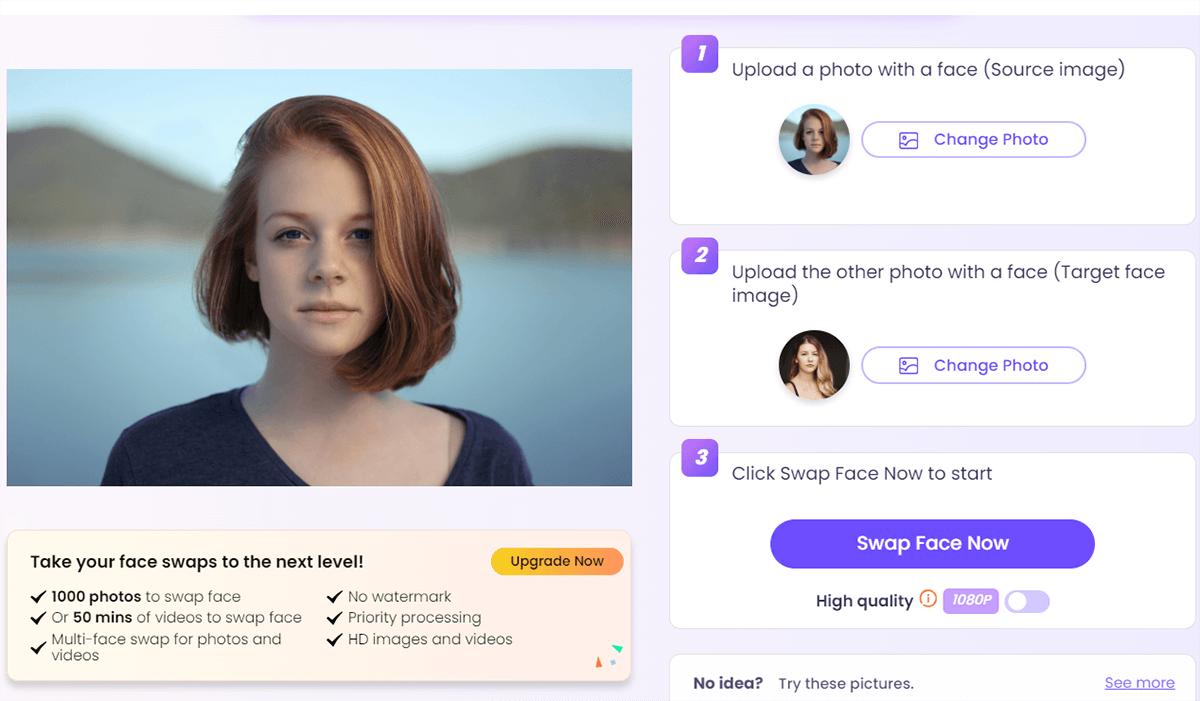
Uploading Single Face For Swapping
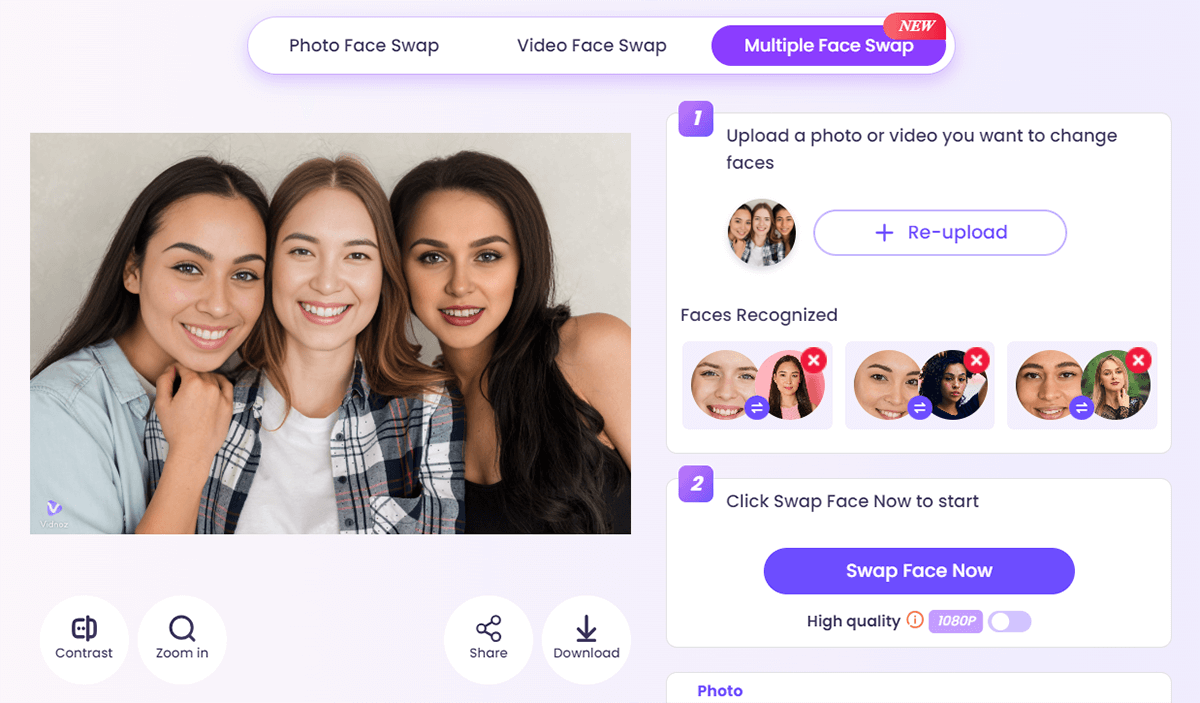
Uploading Multiple Faces For Swapping
Step 4: Click the “Swap Face Now” button the see the result
It takes about one minute for Vidnoz to present the outputs to you. Again, we’re impressed by how AI can do amazing things so quickly.
The results are so similar in quality to the original that it’s difficult to tell them apart. It’s quite amusing, isn’t it?
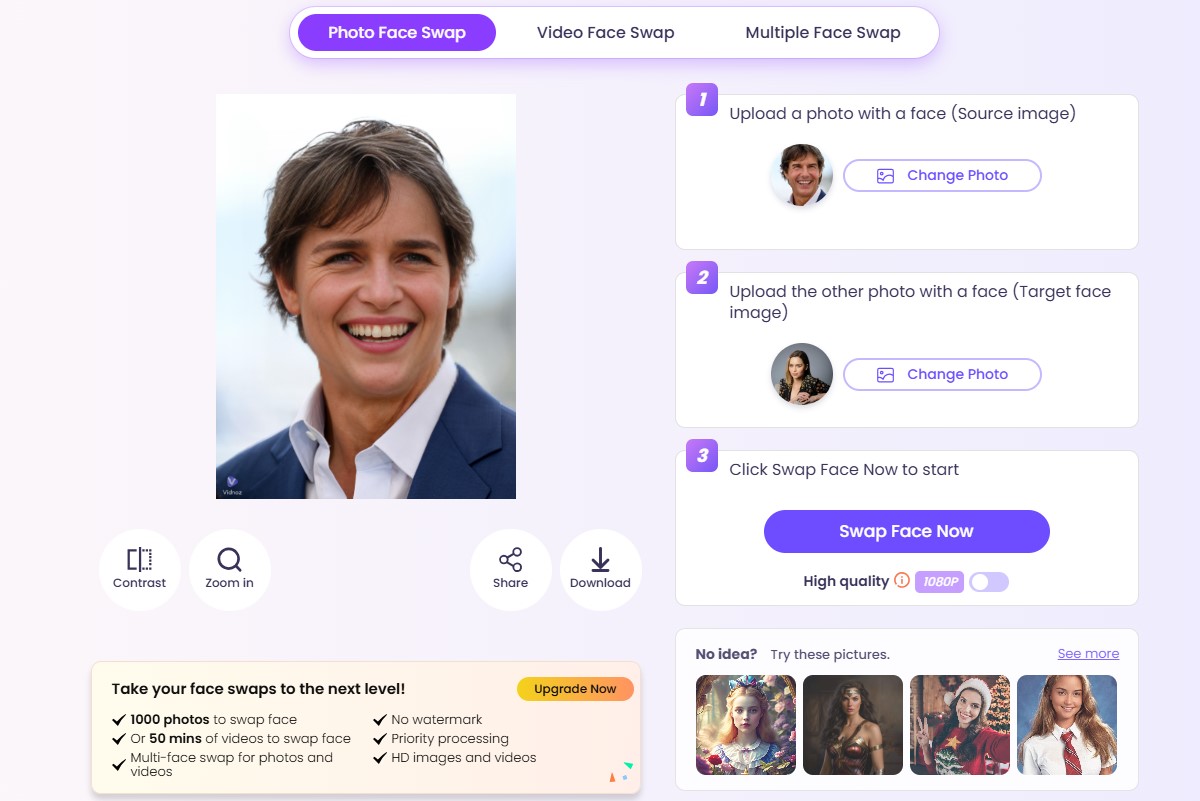
The Result Of Vidnoz AI Single Faces Swap
The Result Of Vidnoz AI Multiple Faces Swap
If you want to change your face to another picture for a good-looking resume image or business photo, consider using Vidnoz AI headshots for reliable results.
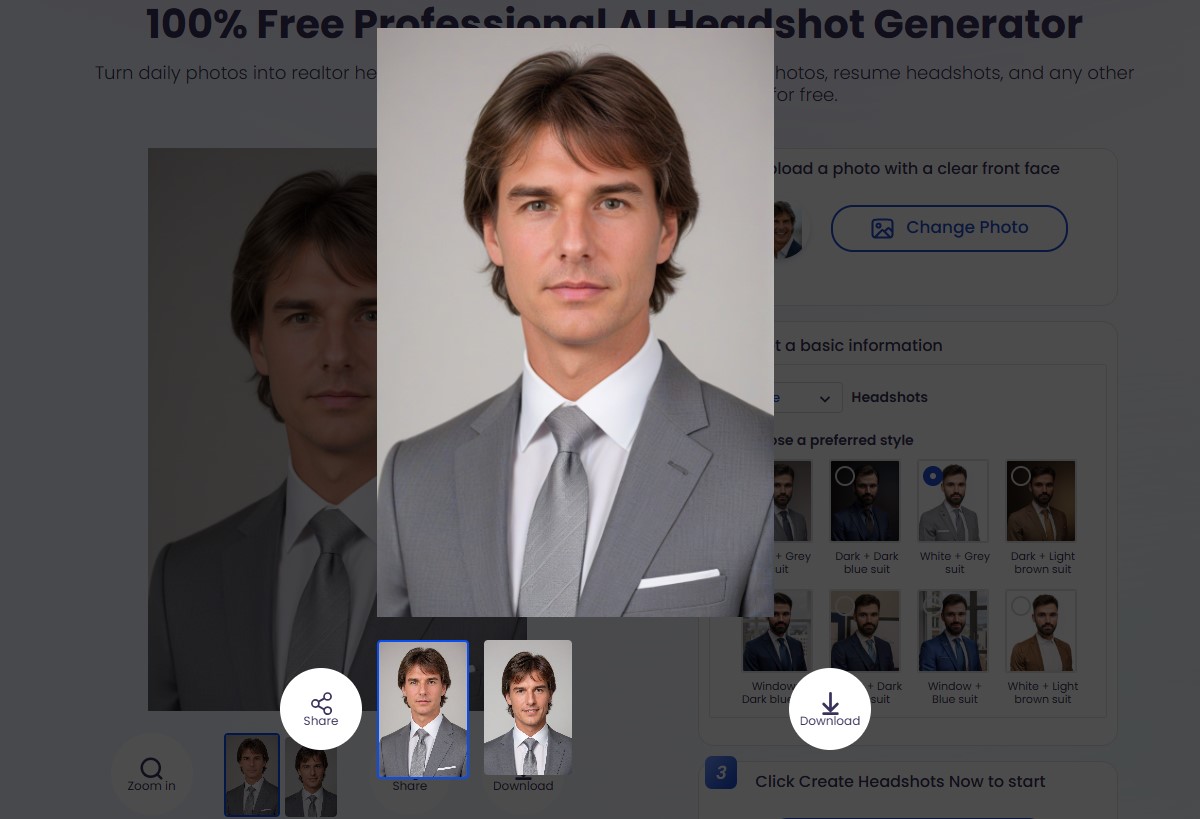
Vidnoz Professional AI Headshot Generator
HeyEditor is another reliable tool that lets you put someone’s face on another picture. The process is as straightforward as what Vidnoz offers. Upload the faces, and HeyEditor will do the rest.
Step 1: Visit the HeyEditor website and choose the Photo Faceswap feature. Then, log in using your Google account
Step 2: Upload the source images
Step 3: Select the target face image
Step 4: Click “Generate” to start changing
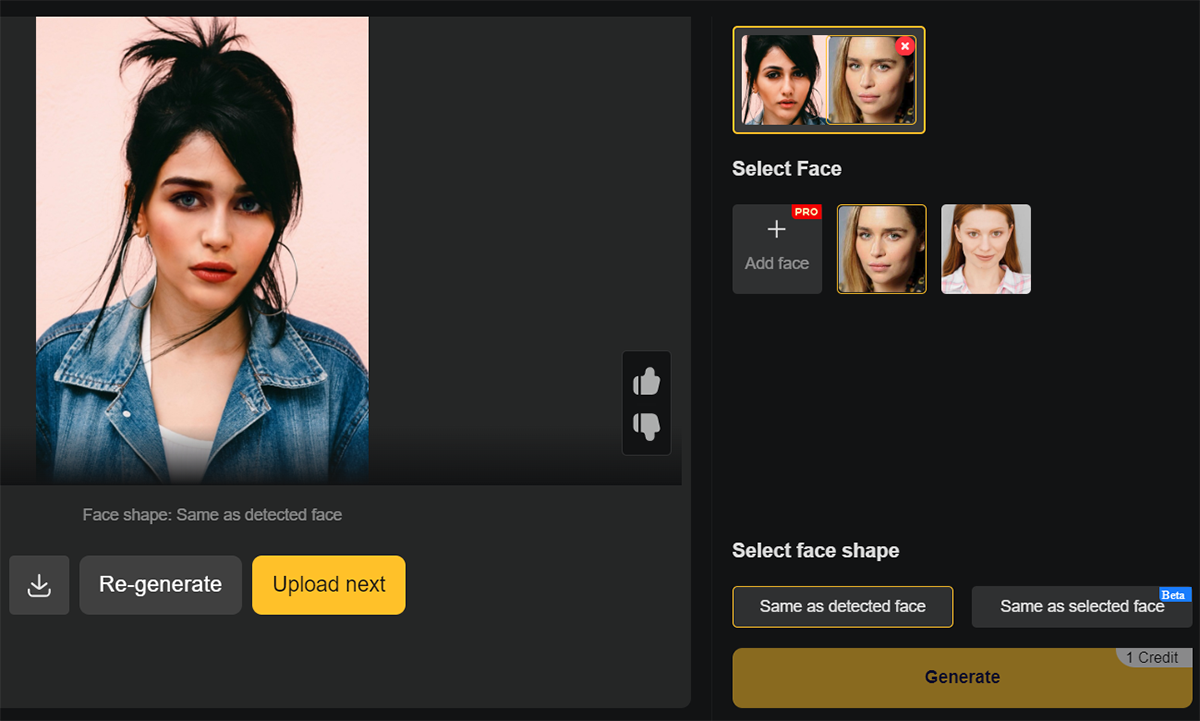
Add Your Face On Another Picture With HeyEditor
Related Articles:
6 Best AI Face Swap Meme Online Tools 2024 [Guide Included]
11 Free Deepfake Porn Maker Online 2024 (Image, Gif, Video)
Now, let’s explore how to add a face to a picture using Canva. While the previous methods used AI to swap faces, Canva offers a more traditional approach, which requires a bit more effort. This is perfect when you want to swap faces in simpler photos, like those with short hairstyles, similar skin tones, and facing the same direction. Let’s see how it works!
Step 1: Log in to Canva using your account
Step 2: Create a new design with the custom size of your preference
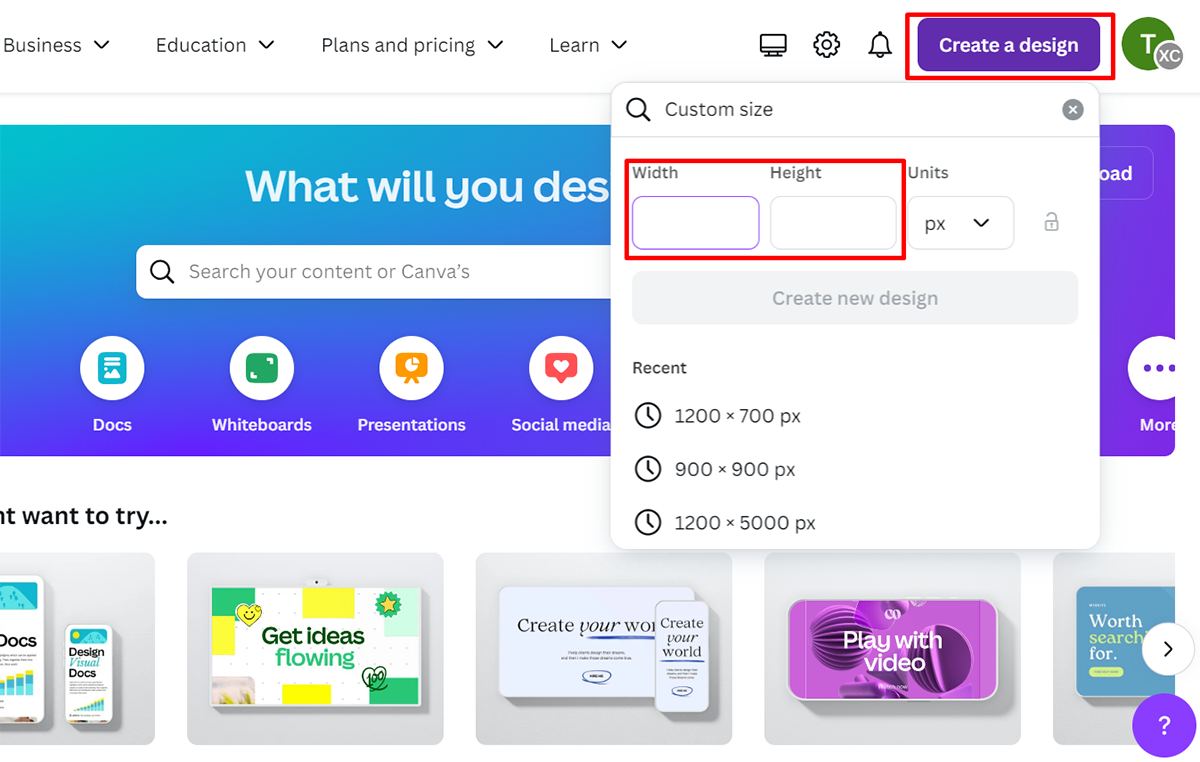
Creating A New Canva Design
Step 3: Upload two photos you want to swap faces
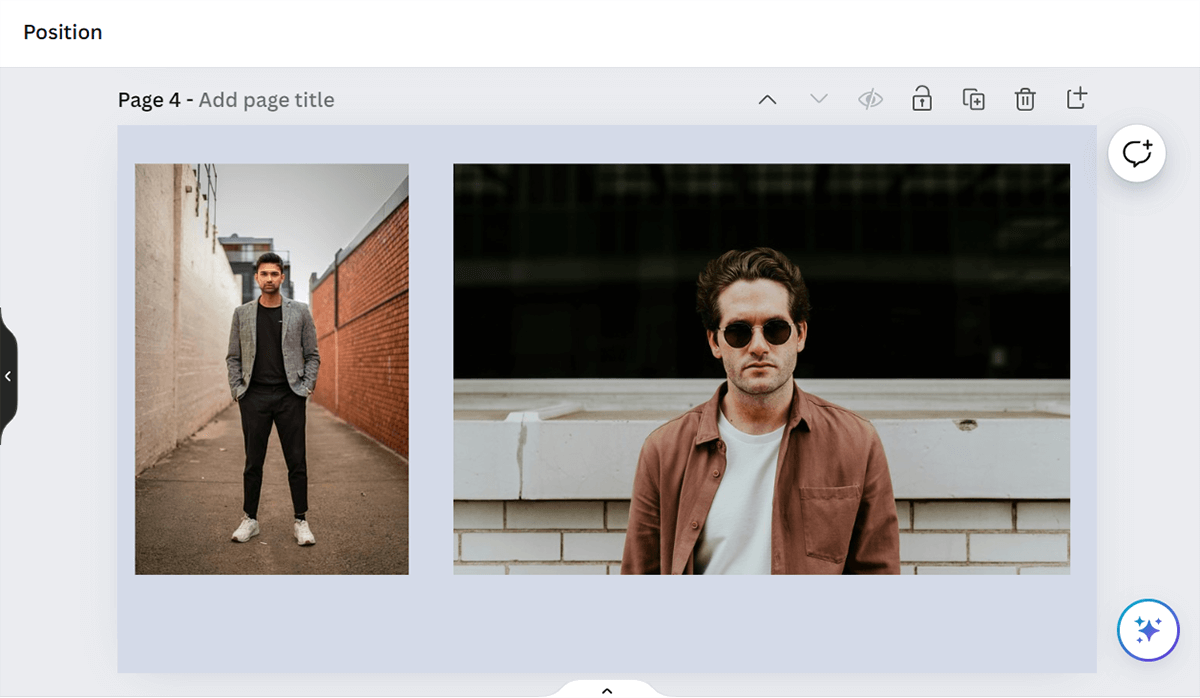
Uploading Photos To Swap
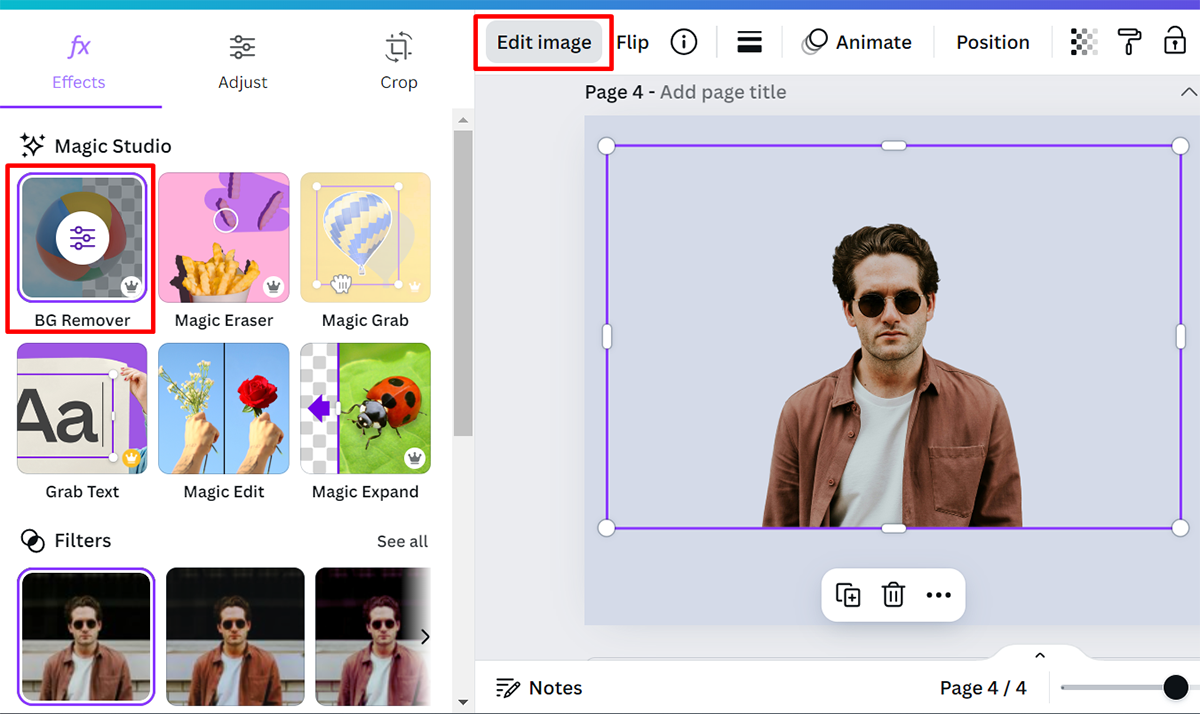
Step 4: Edit the source image and target image
Choose the source image => Edit image => Background Remover. Then, choose the “Magic Eraser” feature right beside the BG Remover. Adjust the brush size to erase the head part.
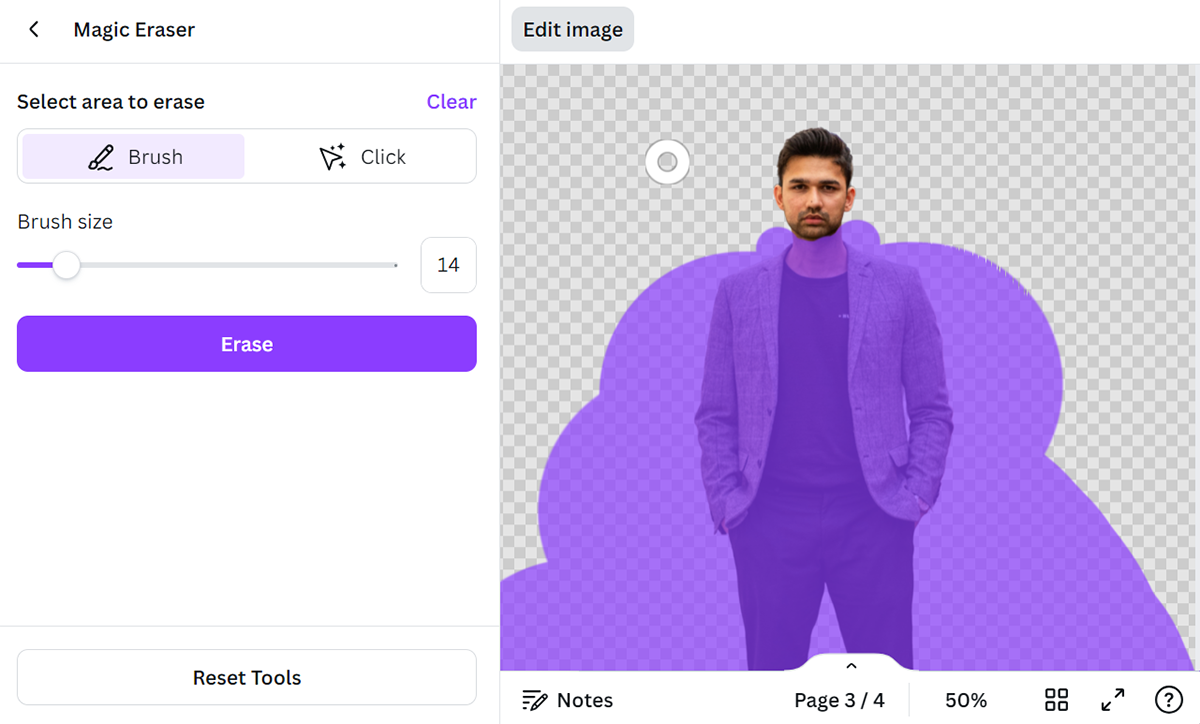
Editing The First Photo
Do the same with the target image. First, you remove the background. Then, you erase the body part.
Editing The Second Photo
Step 5: Attach the head to the body. Adjust the size and position to achieve the best look. If the color tones do not match, you can apply some filter effects to create a harmonious look.
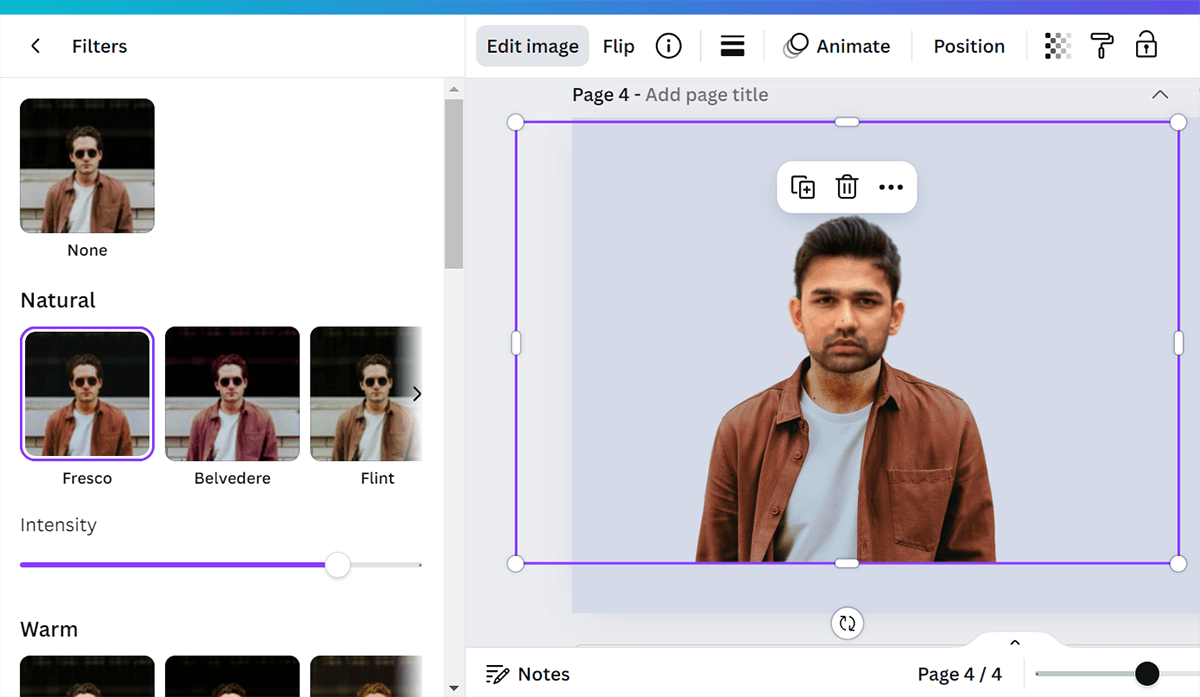
Putting Someone’s Face On Another Picture
Step 6: Your image now is ready to download.
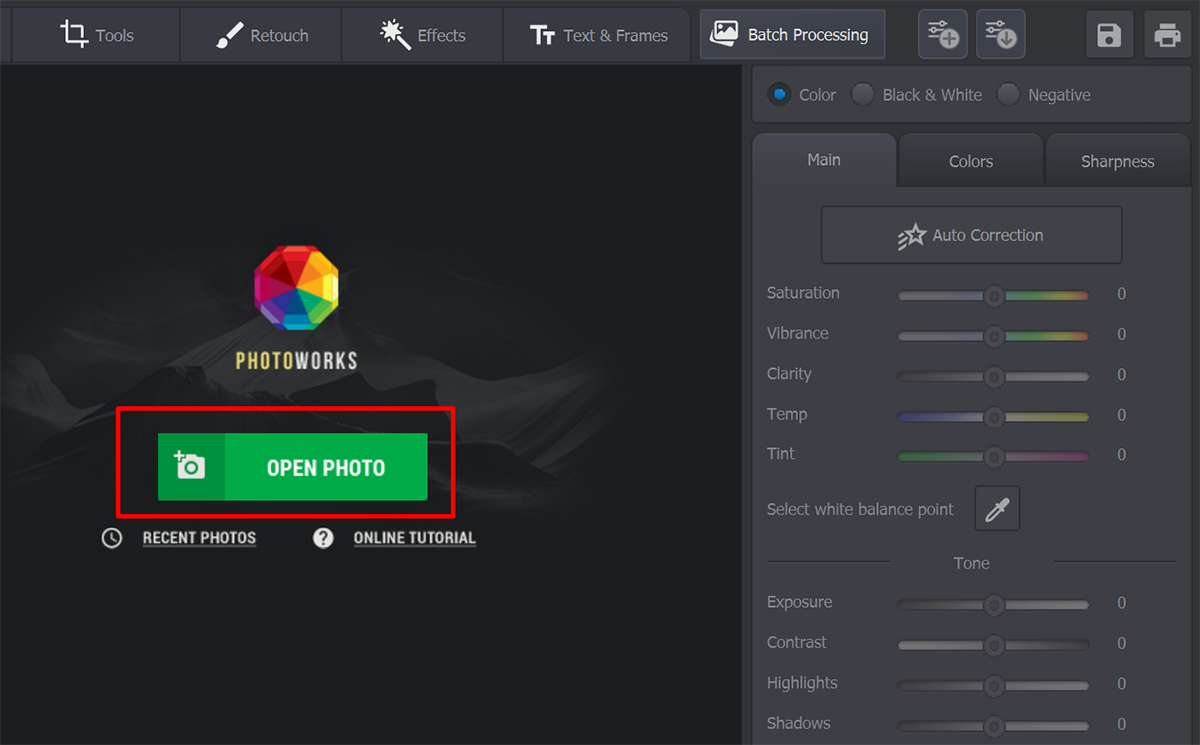
While Photoshop is known for its spectacular photo editing feature, it’s quite pricey and complicated to use. So, how to put someone’s face on another picture without Photoshop? Here’s an alternative: the downloadable PhotoWorks, which offers a free trial.
Step 1: Visit the official PhotoWorks site, download, and install its software
Step 2: Open the app and upload the photos that you want to use
Uploading Photos In PhotoWorks
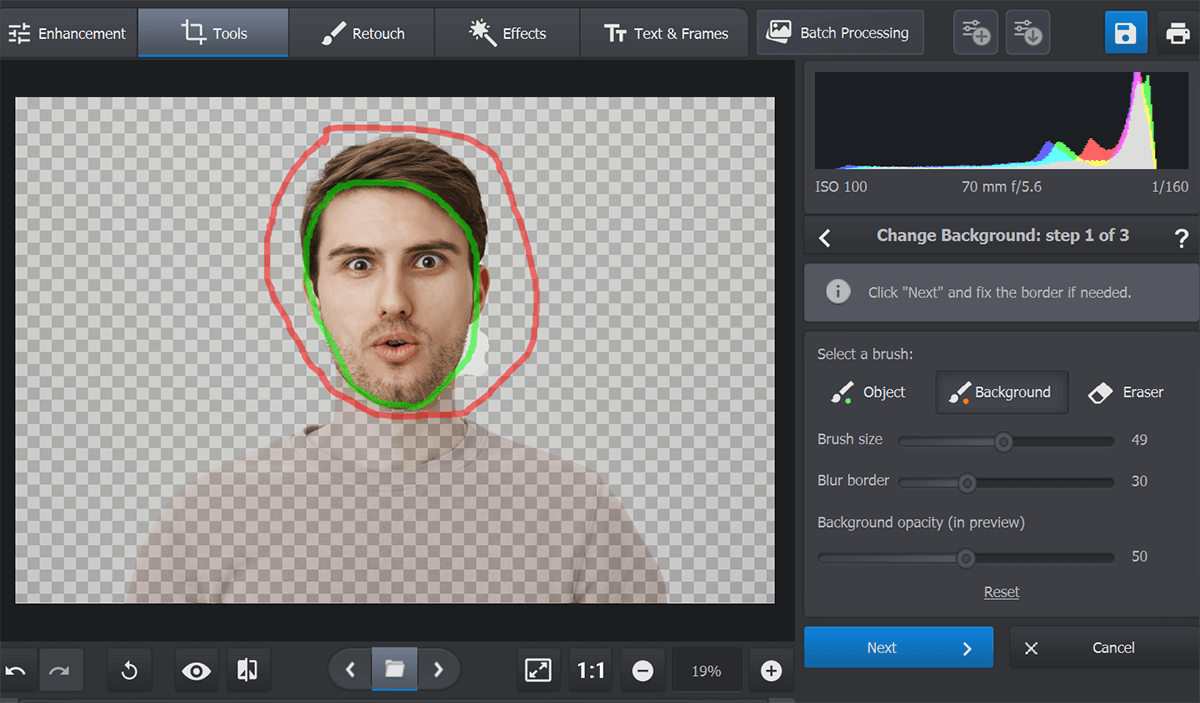
Step 3: Choose Tools => Change Background
PhotoWorks’ Feature To Put Someone’s Face On A Picture
Step 4: Pick the green brush and mark the face area you want to keep. Then, choose the Red brush to mark the background area which you want to replace.
Once done, click “Next”
Choosing The Face Area
Then, Refining The Selection Area by choosing the “Object +” or “Background – “ on the left too refine the chosen area
Step 6: Click “Select Background Image” and upload the source image from your library
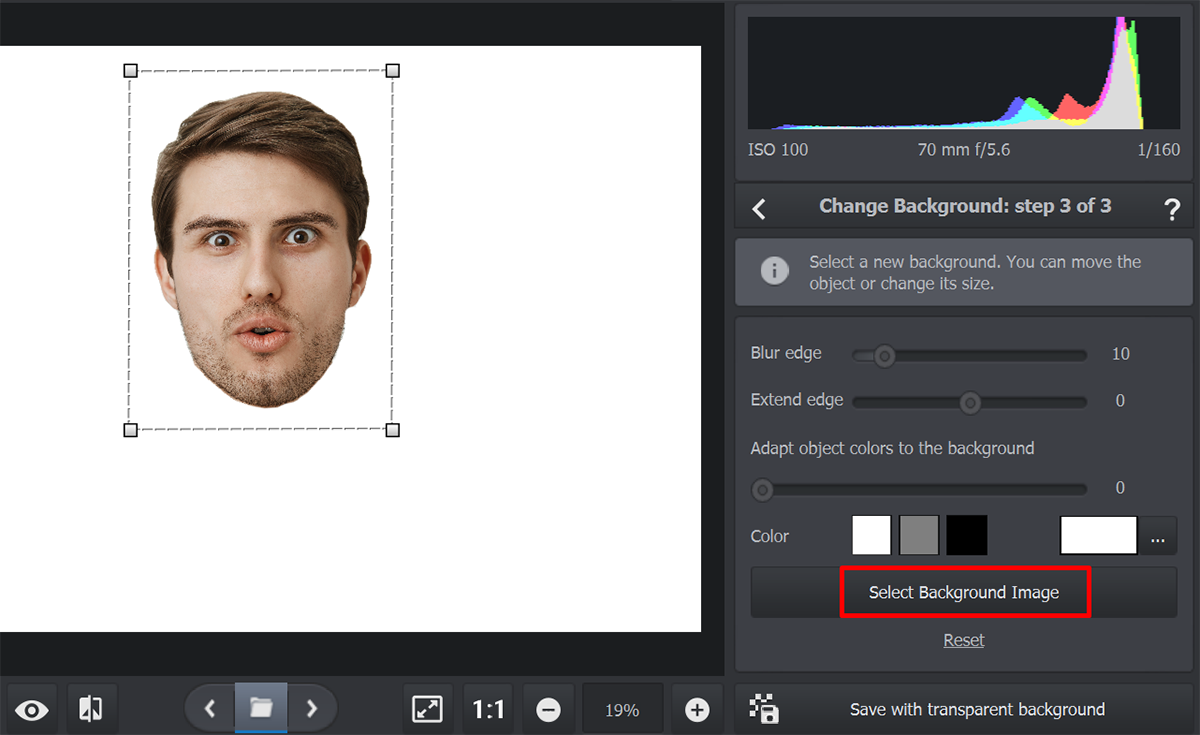
Adding A Background For The Face
Step 7: Change the size and direction of the cut image for a perfect fit. Then, click apply.

Using PhotoWorks To Add A Face To A Picture
Now that you have learned how to put someone’s face on a picture, choose the tool that suits you best and experiment to see interesting results. Besides AI photo face swap, you can also try video Face swap, which will be promisingly entertaining and valuable.
Though we’re wrapping up our guide on this topic, don’t leave our site soon. Techdictionary shares many more insights and useful information about AI tools and development. Browse to keep reading!