


Submagic
Submagic is an AI-powered subtitle generator that helps you create videos with viral potential, ideal for short formats like Instagram Reels and YouTube Shorts.
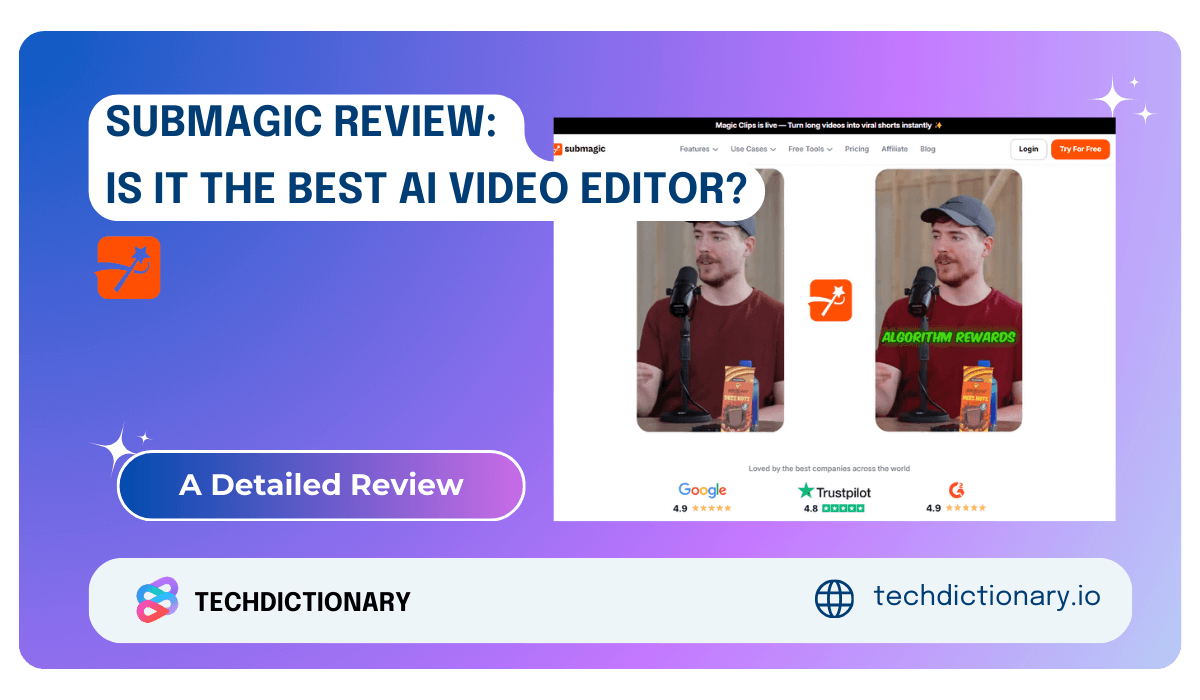
Here is my quick Submagic review: It is a convenient and efficient auto subtitle generator that streamlines the process of adding subtitles to videos. I can quickly upload a video and get good-quality subtitles, which saves me time in editing. The tool also lets me customize the style of the subtitles and add emojis. However, there is one thing I don’t like about this tool, which I will explain below.
What is Submagic?
Submagic is an AI-powered subtitle generator that helps you create videos with viral potential, ideal for short formats like Instagram Reels and YouTube Shorts. Just upload your video, choose the caption language, and let Submagic handle the rest. It automatically generates captions and can add emojis, b-rolls, zooms, and sound effects, making video creation effortless.
Who is Submagic for?
- Content Creator: If you frequently create content for social media platforms like TikTok, Instagram Reels, or YouTube Shorts, Submagic’s quick editing and captioning features will be invaluable.
- Targeting a Global Audience: If you want to expand your reach internationally, Submagic’s multi-language support will help your videos connect with viewers around the world.
- You Value Time: If you’re tired of spending hours manually editing and captioning videos, Submagic’s AI-powered tools will save you time, allowing you to focus on more creative endeavors.
In-depth Submagic Review: Key Features Breakdown
1. Transcribe and add captions to your video
Just like I mentioned, editing an engaging TikTok video is a pain and can take forever.
But now you can do all that—the whole process, from adding captions, changing colors, to moving emojis—in just 1 minute.
You can start by creating a free account and then using the dashboard to create a new project.
You upload a video, which should be in a 9×6 ratio for platforms like Instagram Reels and YouTube Shorts.
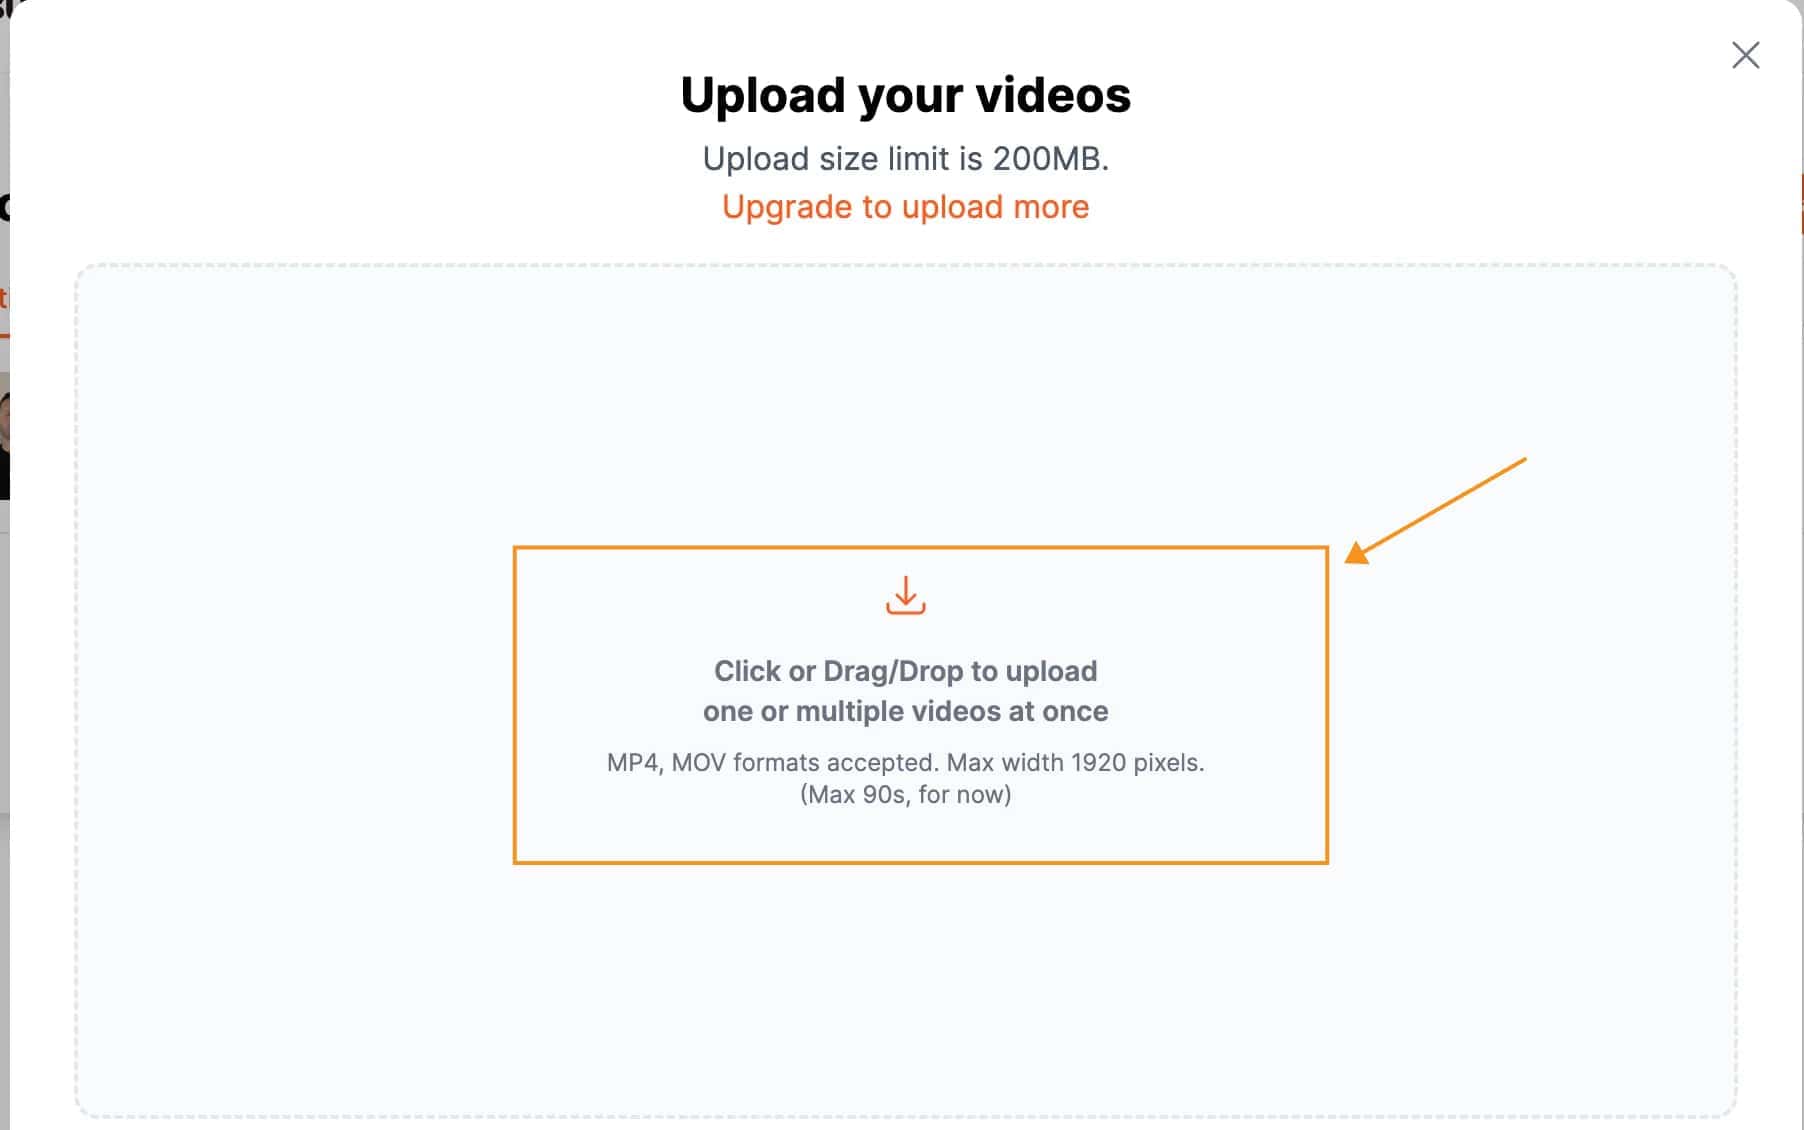
Once your video is uploaded, Submagic allows you to add professional captions, styles, b-rolls, and descriptions.
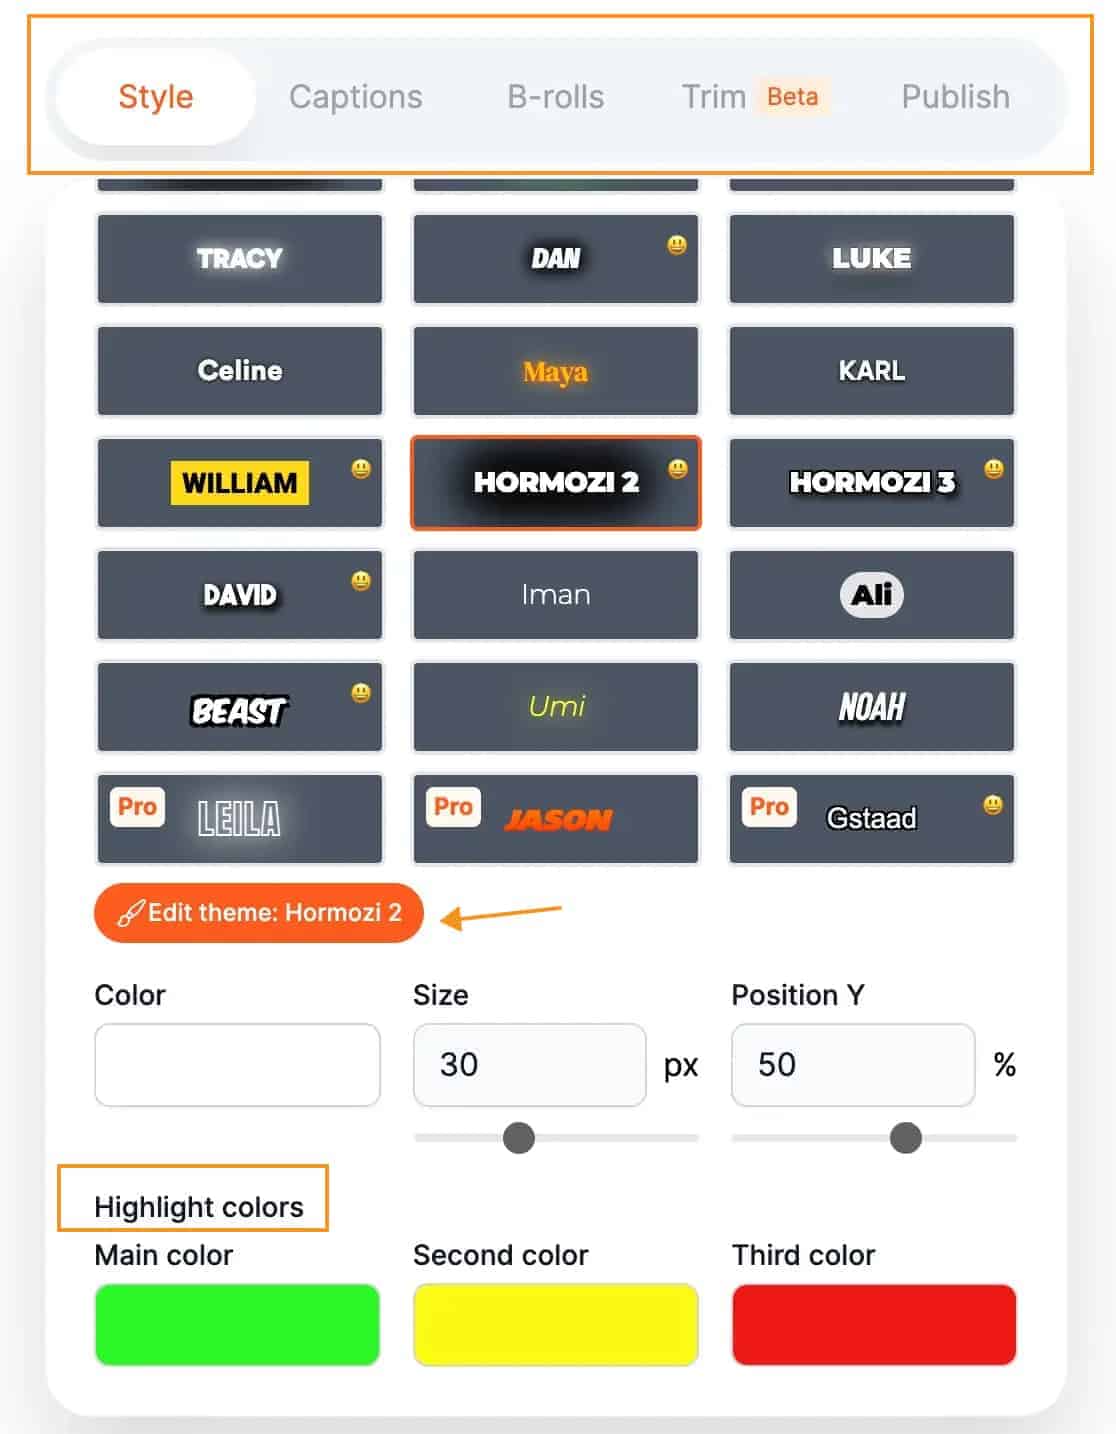
As you can see, speaking of caption styles, there are a lot to choose from, from the Alex Hormozi style with bold, attention-grabbing fonts to the Ali Abdaal style with clean, minimalist aesthetics.
In the style section, you can pick different themes for your captions and change their size, position, and colours to make your video stand out.
If the captions need tweaking, you can edit them and change the emojis too. You can even add sound effects to the emojis for extra flair.
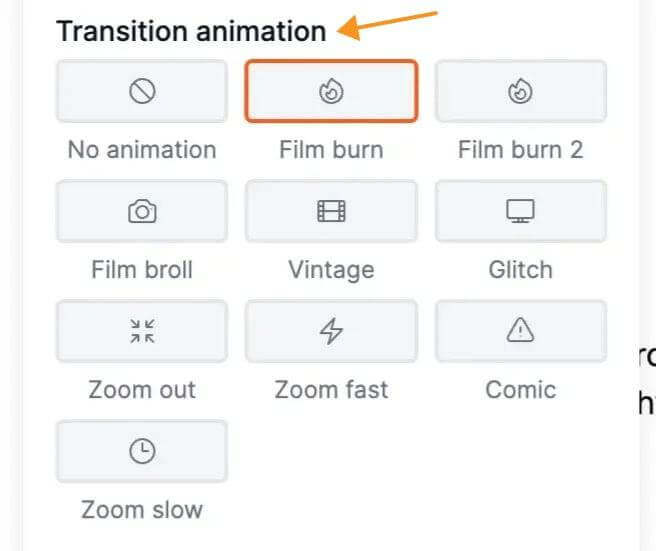
2. Magic B-Rolls
Have you ever watched a video and noticed those cool extra clips that pop up or the smooth way one scene changes to another?
Those are called ‘b-rolls’ and transitions, and they’re like the secret spices that make your video way more fun to watch.
But if you’re thinking, “That sounds hard to do,” don’t worry! Submagic has this neat feature that does it for you.
With Submagic, you just click on the ‘magic B-rolls’ button, and it gives you a bunch of options to choose from.
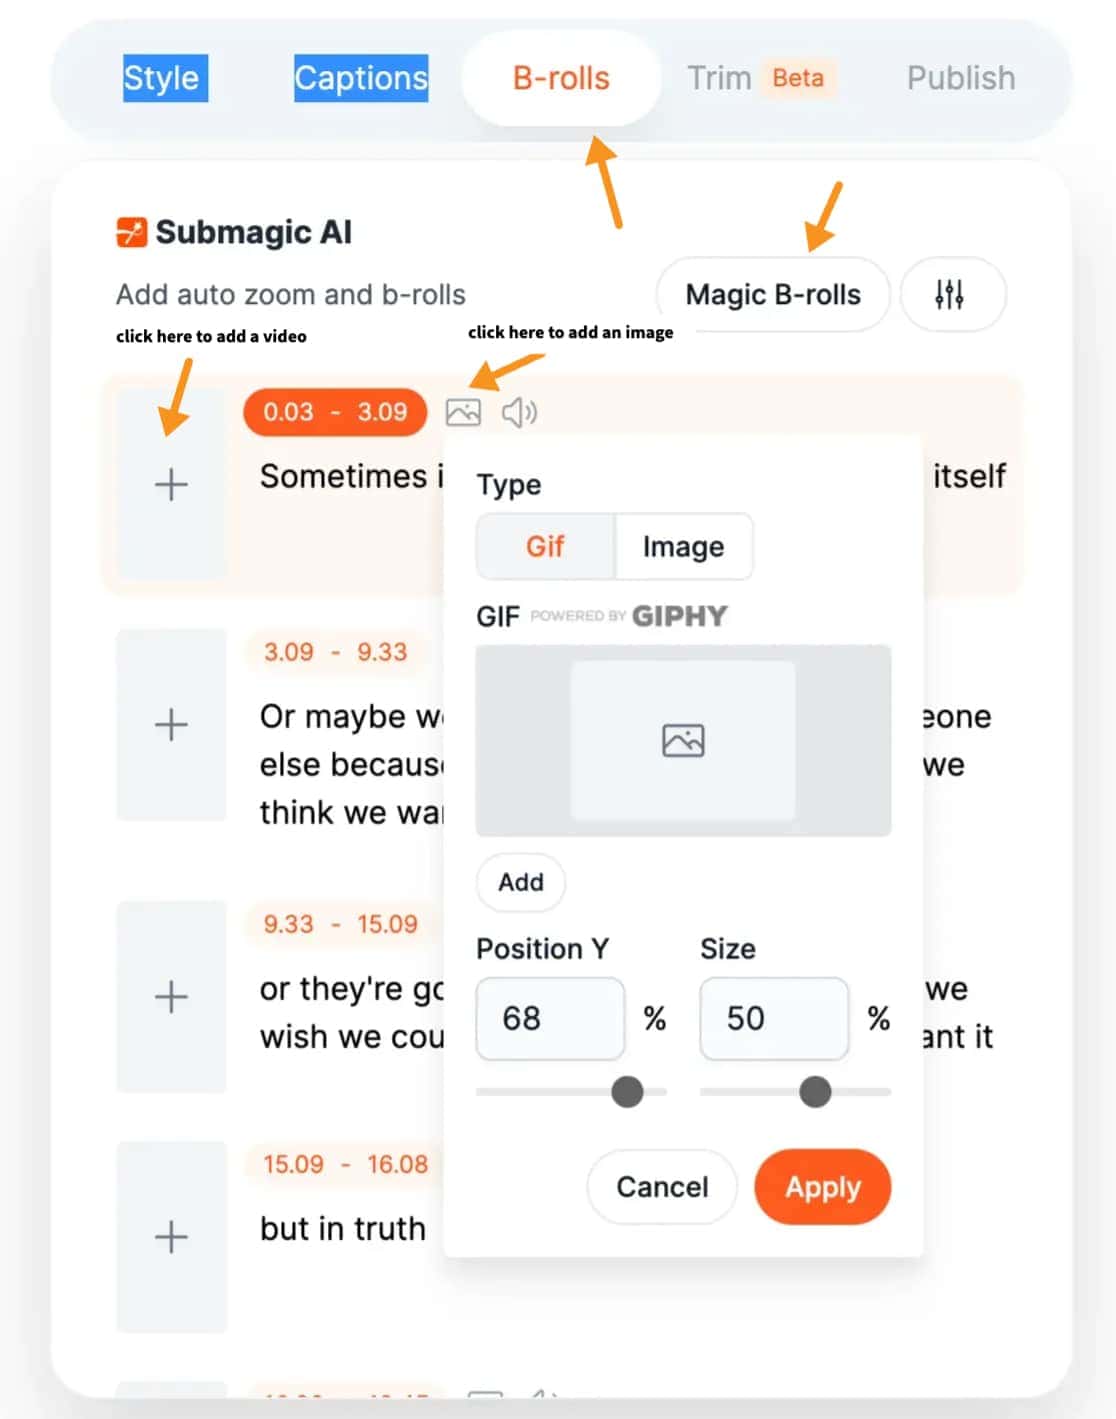
If you’re on the Pro Plan, it even searches through a premium library of paid stock videos for you.
And for transitions, just as simple, you just pick where you want a fancy switch from one scene to another, click on the type of transition you like—maybe a quick zoom or a vintage look—and it’s done.
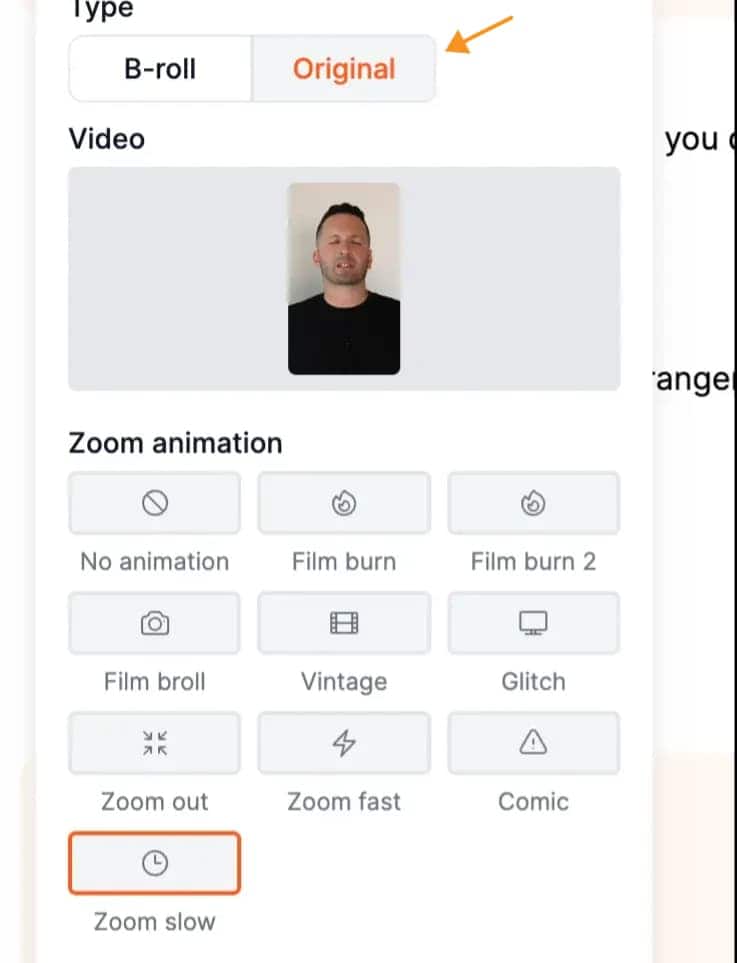
And the best part is that you can even add transitions to your footage by clicking “original” and then choosing your preferred transition, making your own footage look like it was done by a pro.
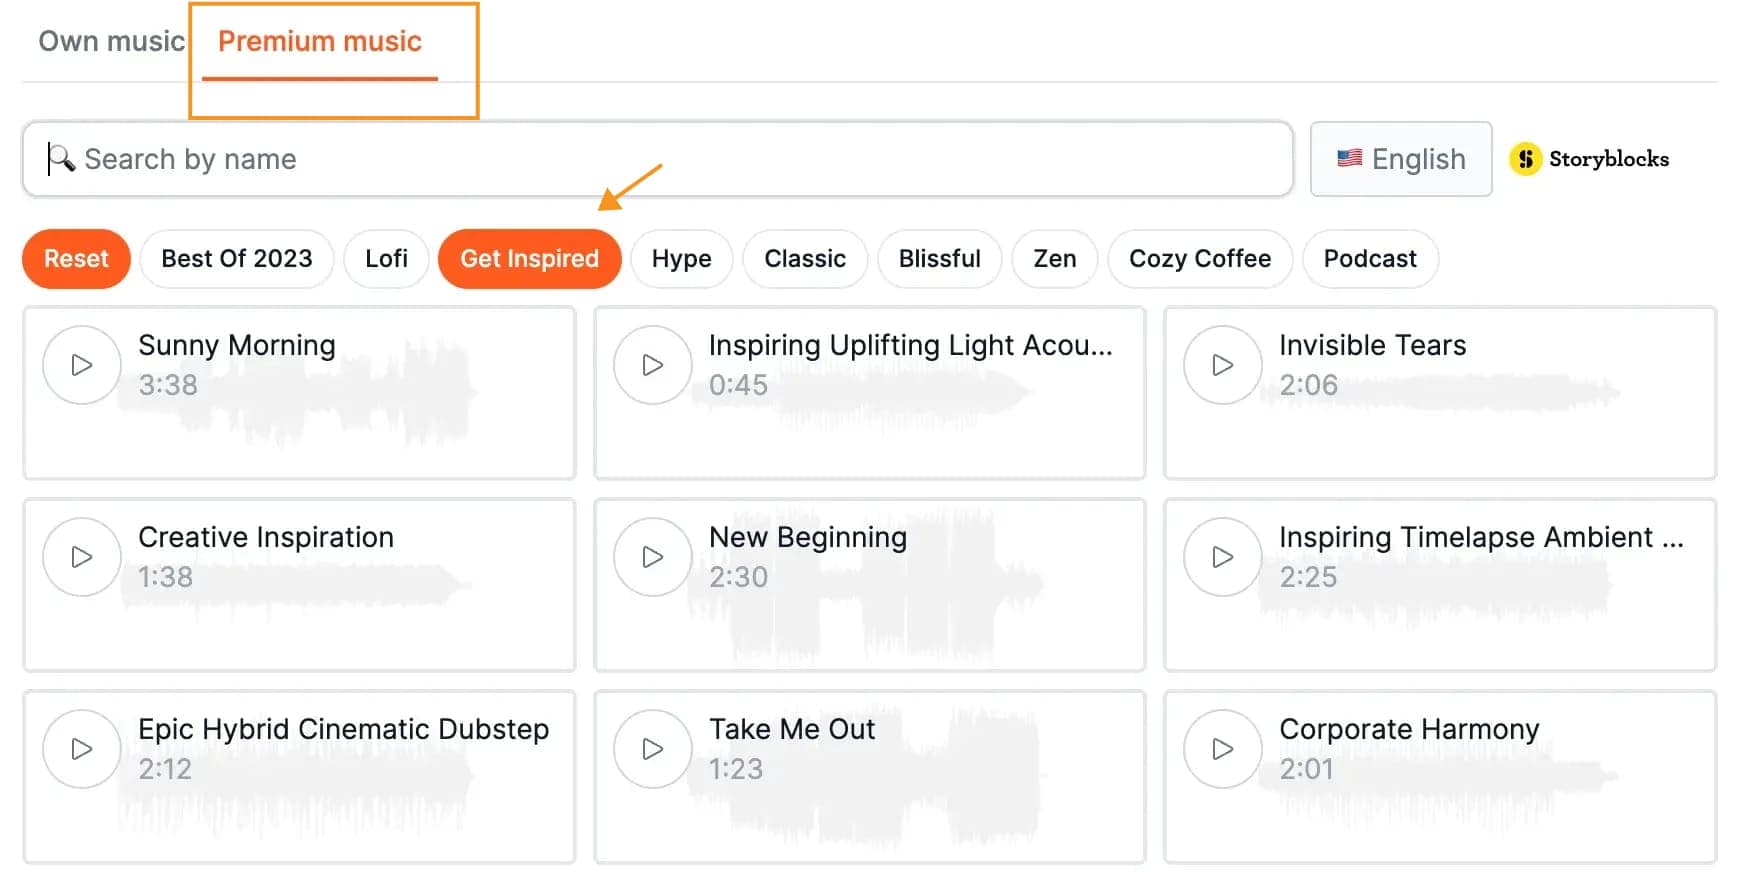
3. Add background music and sound effects with just one click
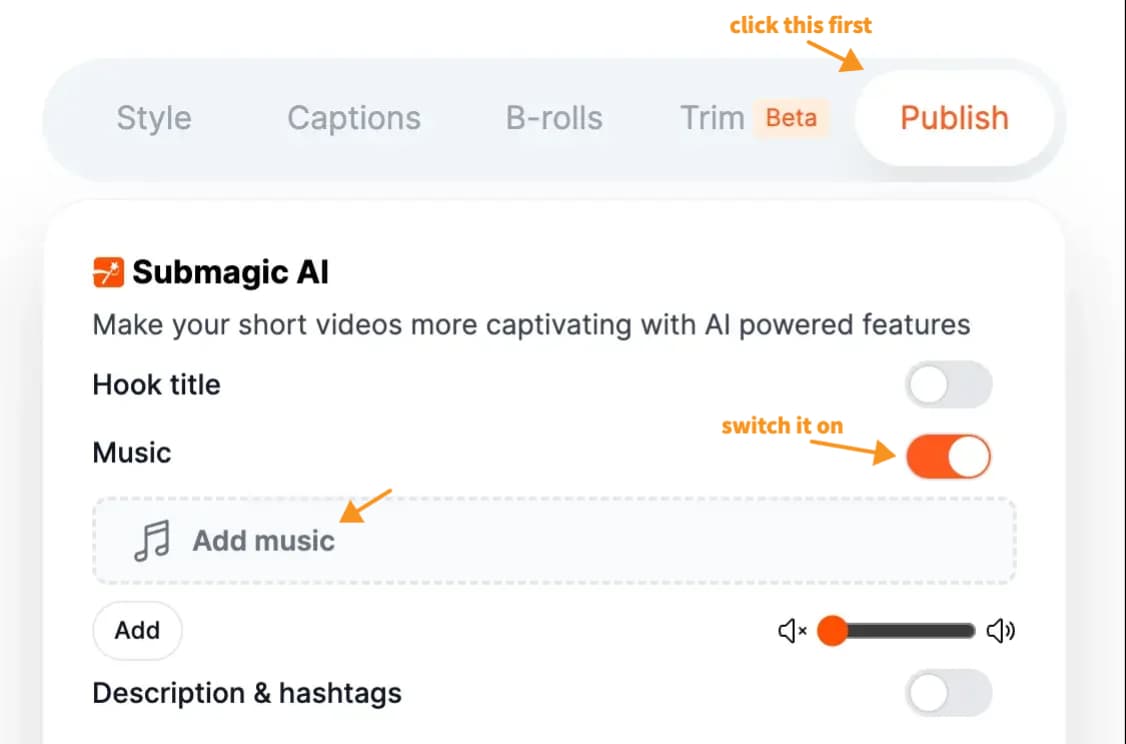
With Submagic, you don’t have to dig through endless tracks or fiddle with complicated settings.
You just head over to the music section, and there’s a whole bunch of tunes waiting for you.
If you want something that’s inspiring, just listen to a few samples, pick the one that gets your toes tapping, and click ‘apply’.
It’s that straightforward.
But what if the music is too loud for your talking? You can adjust the volume with a simple slider, making sure your voice and the music are balanced just right.
And those sound effects? Just as simple to add.
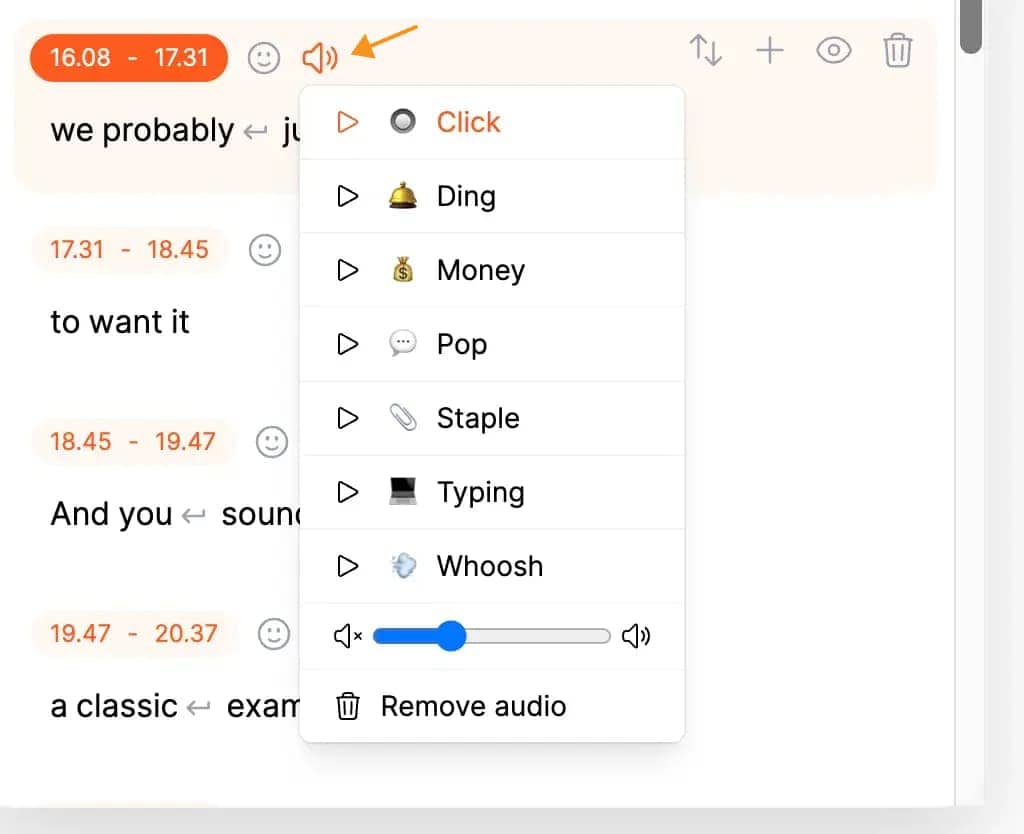
See that “speaker” icon? Click it, and you’ll see a list of common sound effects used in short-form videos (normally, I have to download each of these on Youtube).
Whether it’s the ‘ding’ for a moment of revelation, the ‘click’ for a key point, or the ‘typing’ sound for a work scene, you can add it in with just one click.
Once you’ve chosen the right sounds for the right moments, hit ‘export’. Submagic takes over from there, integrating your sound effects into the video.
Submagic even fades the music out for you at the end, giving your video that professional touch.
4. Write video description for you
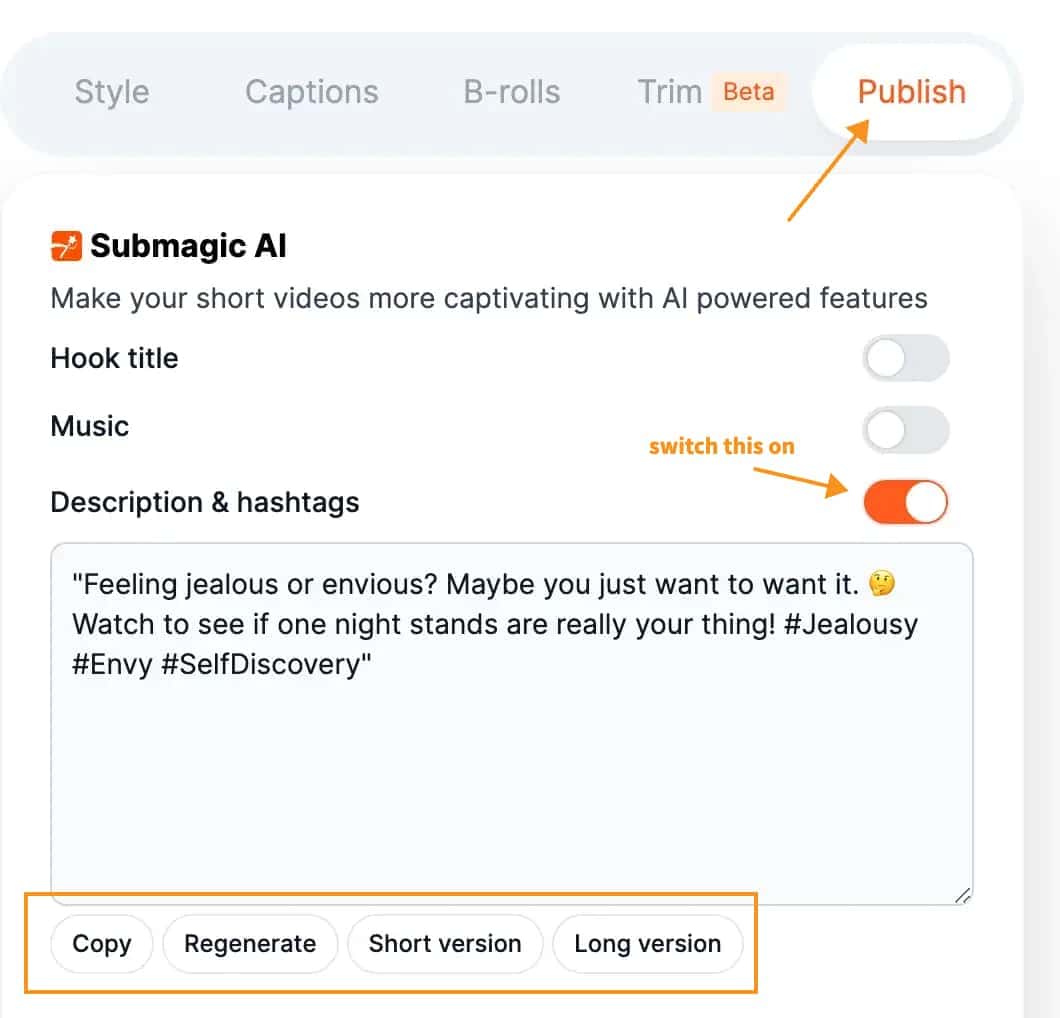
This is an extra feature that’s all about saving you time. When you’re all done with the visuals and sound, there’s still that little box under your video that needs some love – the description.
But after all the editing, who has the energy to write that?
That’s where Submagic steps in.
You don’t have to stare at a blank screen or stress over what to say. Submagic looks at your video and figures out the best words to describe it.
All you have to do is check out what Submagic suggests and make any tweaks you want. Maybe you add a personal touch or a call to action for your viewers.
And just like that, your video is ready to go, description and all.
It’s a small thing that can make a big difference, and Submagic makes it as simple as a few clicks.
How To Edit A Video With Submagic? A Step-by-step Guideline
Step 1: Create an Account
To get started with Submagic, create an account. The free version includes a watermark on exports, so you’ll need to upgrade to a paid plan, starting at $14 per month, to remove it.
Step 2: Upload the Video
Once your account is set up, upload your video clips. The process is simple, allowing multiple uploads at once. Submagic generates AI captions for your videos within seconds.
Step 3: Trim the Video
After uploading, you can trim your video to remove unnecessary parts. Submagic makes this easy, allowing for automatic removal of silences and filler words while cleaning up your audio.
Step 4: Edit the Captions
Next, edit the captions. By default, they are plain white text, but Submagic lets you style them like popular creators do. You can apply these themes with just one click.
Step 5: Fine-tune the Captions
Improve your captions by adding, editing, or deleting text using the Captions tab:
[A screenshot showing the captions editor in Submagic]
Add emphasis to important words by clicking the brush icon:
[A screenshot showing the emphasis tool in Submagic]
To remove emojis added by Submagic, click the emoji removal icon:
[A screenshot showing the emoji removal tool in Submagic]
You can also add sound effects by clicking the microphone icon and selecting an option you like.
Use control icons to move, hide, add, or delete captions:
[A screenshot showing the caption control tools in Submagic]
Step 6: Add B-Rolls (Optional)
Make your video more engaging by adding B-rolls. Click the B-rolls tab, choose a spot on the timeline, and select a video.
Step 7: Boost Your Video (Optional)
Add visual effects easily using the Boost tab. Preview options like slow motion or zoom in/out for your YouTube Shorts.
Step 8: Auto Reframe Your Video
Submagic can auto-reframe your video for different social media platforms. Click the Reframe tab and choose your platform. Submagic will adjust the framing for you.
Step 9: Export Your Video
When ready, click the Export button, select your settings, and click Export again. Submagic will process your video quickly for easy sharing on YouTube or social media.
Submagic Review: What We Like and Don’t Like
| PROS | CONS |
| ✅Quick video creation
✅Easy to use ✅Automatic features ✅Customizable ✅Style options ✅Magic b-rolls ✅Cloud-based platform |
❌Watermark
❌Limited free version ❌Ratio restriction ❌Might be too simple ❌Template rigidity |
How Much Does Submagic.co Cost?
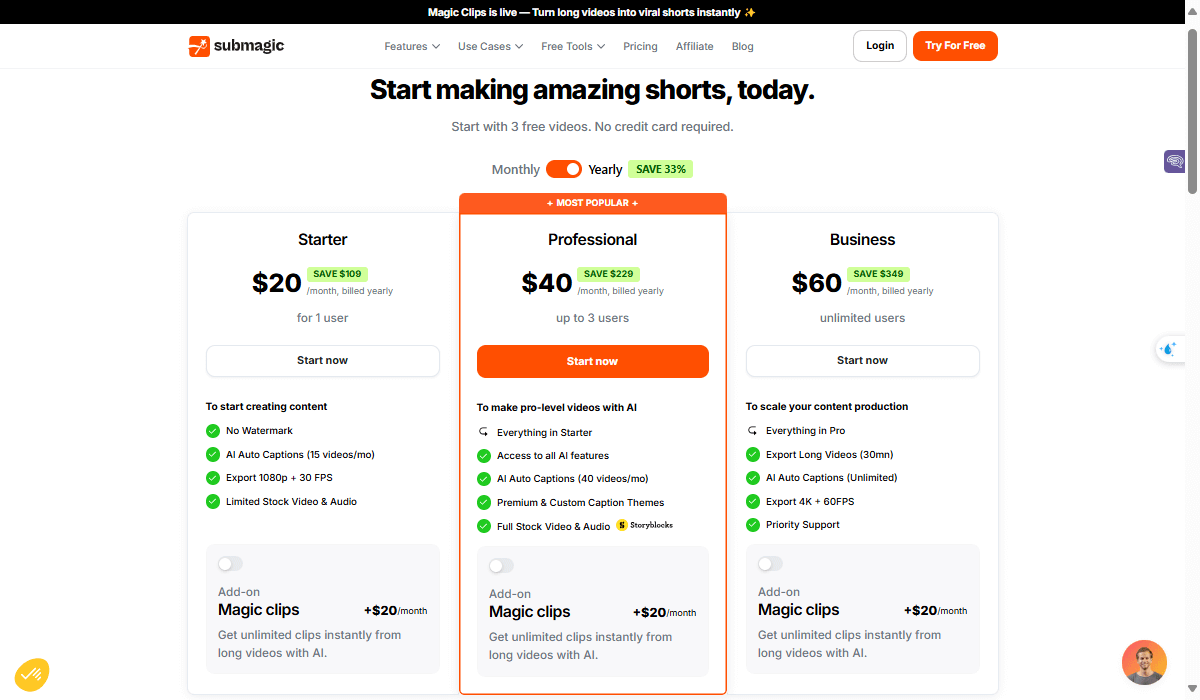
Starting with the Free Plan, you’ll have a watermark, but it’s great for testing. When ready to upgrade, the Starter plan at $16/month (billed yearly) is ideal for new creators wanting more features without a watermark.
For those looking to produce more content, the Pro plan at $40/month (billed yearly) offers unlimited videos and premium features.
For agencies handling multiple clients, the Agency+ plan at $120/month provides unlimited videos and advanced tools. Compared to hiring an editor, Submagic’s pricing is a cost-effective way to maintain control and scale your content.
| Plans | Starting Price
(Per Month) |
AI Auto Captions |
| Starter | $29 | 15 |
| Professional | $59 | 40 |
| Business | $89 | Unlimited |
Submagic offers a cost-effective solution compared to the high costs of hiring an editor. With Submagic, you maintain control over your content and have the flexibility to grow as your needs change.
Final thought: Is Submagic Worth the Money?
Alright, let’s wrap up this Submagic review. I think it’s worth considering. Submagic is a user-friendly AI video editor for better YouTube Shorts. It offers valuable features and customization options for both beginners and experienced editors. The free version has a watermark, but the paid plans are a great value for serious creators. Overall, the convenience of Submagic outweighs its downsides. So, Is Submagic the AI video tool to go for? If you’re after quick and easy subtitles, it’s a strong yes.
Our Approach to AI Tools
- We search the internet and join AI communities to find the best and trending tools.
- We verify each tool’s legitimacy by checking if the founders are traceable and credible reviews exist.
- We sign up with our own details, including payment info, when necessary.
- We test the tool to ensure it delivers on its promises and uncover hidden tips to share with our readers.
- We confirm pricing matches what’s stated on the homepage and look for any additional features.
- We review real user feedback to ensure a comprehensive understanding of the tool.
- We test similar tools and their competitors to identify strengths and weaknesses for balanced recommendations.
- We research community discussions about AI tools and provide specific insights.
- Our reviews focus on four key aspects: Authenticity (Does The Tool Do What It PR?), Competency (Does The Tool Do It Main Job Well?), Affordability (Does The Price Is Reasonable For The Value Given?), and Simplicity (Does Anyone even Beginners can easily Use It?).
- If the tool is not as good as it says, we’ll make sure you know about a cheaper alternative.
The Ratings
- 1 Star: This rating is designated for tools that fail to operate as advertised, may pose risks to users, or are deemed misleading.
- 2 Stars: This rating applies to tools that demonstrate subpar performance, frequently encounter operational problems, or do not satisfy fundamental user requirements.
- 3 Stars: This rating is awarded to tools that meet basic functional standards and address primary needs but lack notable features or an optimized user experience.
- 4 Stars: This rating is reserved for tools that exhibit excellent performance, provide advanced features, deliver a positive user experience, and receive favorable feedback from the community.
- 5 Stars: This rating is allocated to the premier tools in their respective fields, setting industry standards with groundbreaking features and outstanding user experiences.
We’re here to help! If you’re not completely satisfied with your review, please contact us at techdictionary.io@gmail.com. Our team will be happy to take a fresh look at your product. Just a heads up: that means your rating might change. We appreciate your understanding!
Alternatives
Submagic Reviews
There are no reviews for this article yet.